

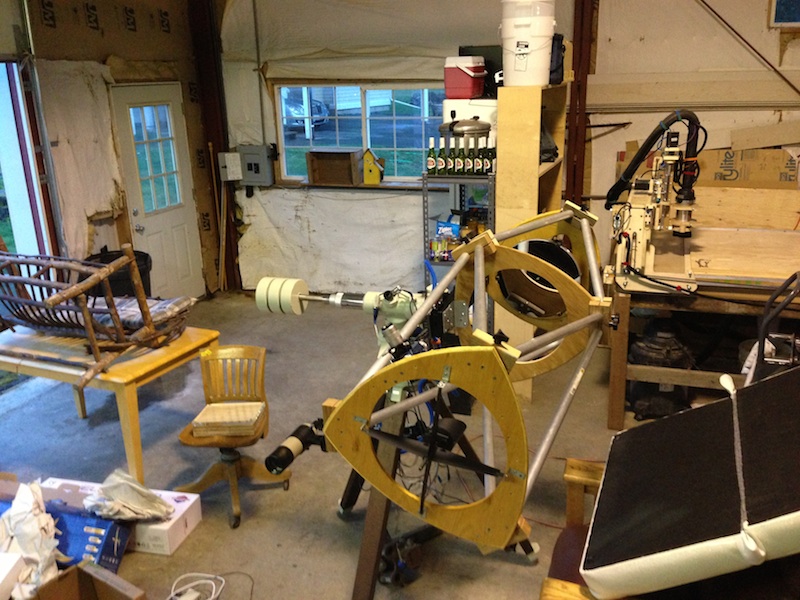
When I left CA, I had just finished doing a pretty major rebuild of Trixie, which as you recall is my attempt at a 13″ Newtonian Astrograph.
The newly-trussed frame seems very sturdy, but the mounting bracket was very hastily thrown together, and I worried a lot about it failing (as this had been a problem with the previous builds).
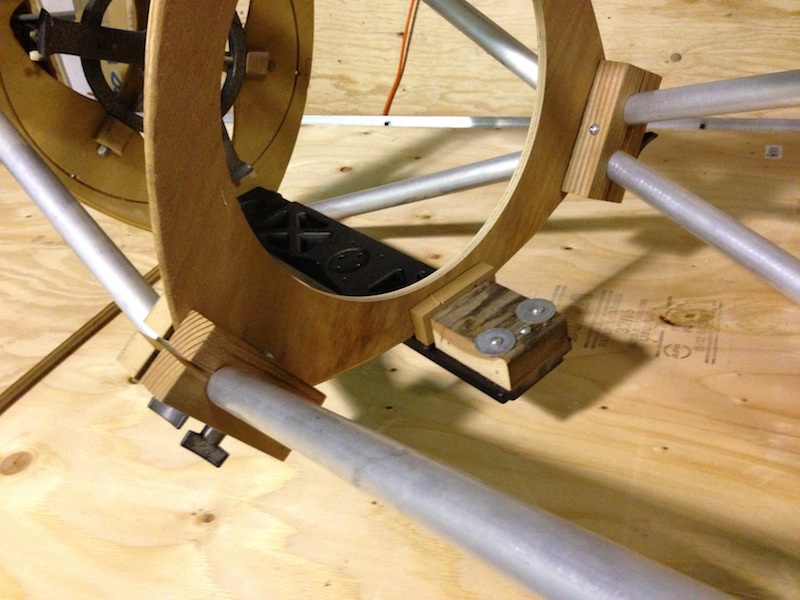
I spent some time wondering about perhaps rebuilding the OTA fairly comprehensively, but after going back and re-reading my posts about Trixie from CA, I decided that really the mounting bracket was probably the only outstanding problem, so I turned my thoughts to replacing just the bracket.
I took my measurements, and then spent a little quality time in the Simpson Strong Tie area of the local Home Depot. I picked out a few likely candidates, and then headed hom to get started.
I had to overcome a 1/4″ rabbet at the end of the mounting plate (It’s a Robin Casady triple mounting plate, designed to hold 3 saddles, and the outside saddles are recessed a bit), and decided that back-to-back L-brackets might be a strong connection. The saddle area has several tapped holes, so I decided to mate the new bracket pieces to the existing holes where necessary, to keep the amount of damage to the Casady plate to a minimum. This meant working my way from the end of the plate towards the center, drilling each hole and then checking to make sure that I’d hit the correct spot before moving on to the next. The 4 existing holes went together pretty easily, and even with my methodical pace, the upper L-bracket was in within 45 minutes or so.
Then I needed to site and drill the 3 holes for the lower L-bracket; there are no holes in the Casady plate in this area, so I needed to drill and tap these myself. This was the most challenging part of the build; two of the holes needed to be sited blindly (now that I’ve done it, I could have done it a bit backward from the way I did, and avoided the “miss” that I made, but I’m getting ahead of myself). I checked the tap set, and found that the 1/4-20 tap calls for a “size 7 drill”. Sigh. I really wish they’d just pick a standard and go with it. I called a friend to figure out what size a #7 bit is, and it turns out to be between 13/64 and 3/16. So, I drilled the holes out to 13/64 and then got to work with the tap. This is fairly exacting work, and it took a long time to get those 3 holes tapped. But I think the result came out pretty well. I had one “miss”, where the tapped hole doesn’t meet the hole in the bracket. But for the price of another bracket, I can fix that and none the wiser.
In all, I think that the new bracket looks really sharp, and feels very, very sturdy.

I put the frame up on the mount, and tried shoving it around a bit, and it didn’t give even a little. I think I’ve finally gotten this build strong enough to run with it.
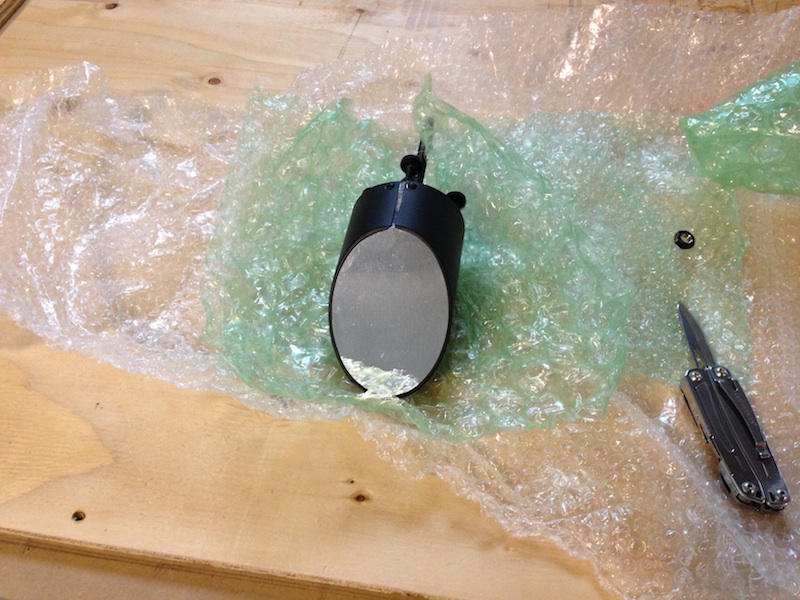
I spent a little time with the compressor, blowing the dust off. With the frame ready to go, I finally unpacked the optics. They’ve been sitting in a box for almost 2 full years, waiting for me to get done with the mounting bracket.
It felt very much like bringing the scope out of hibernation.
First out was the secondary, swaddled in bubble wrap. It’s a big 3.1″ job. There’s a dew heater in its future.
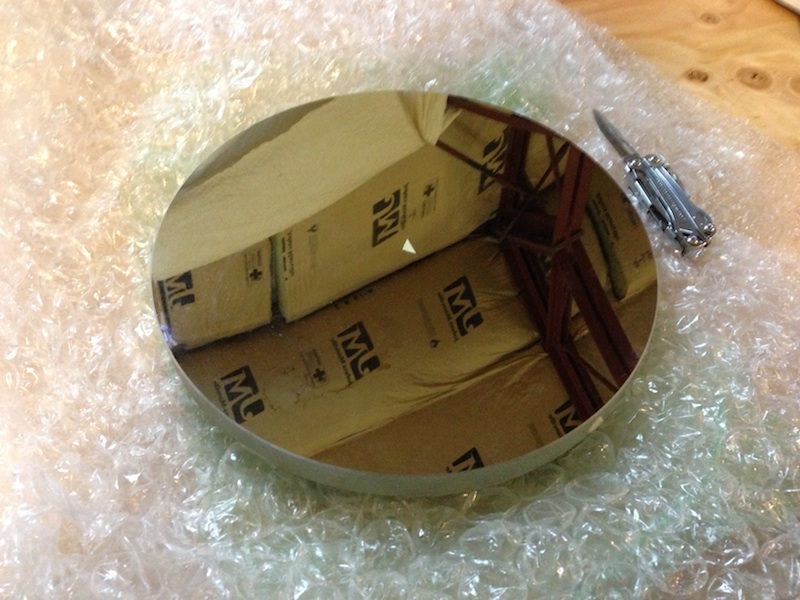
With the secondary in, the UTA was complete. The primary came out next, also in great shape. I’m proud of the job I did packing these delicate items.
The primary took a little concentration to get in, with the floating supports and getting the center arrow pointed properly. At some point, the mirror will need to be recoated, but the mirror’s still in great shape at the moment.
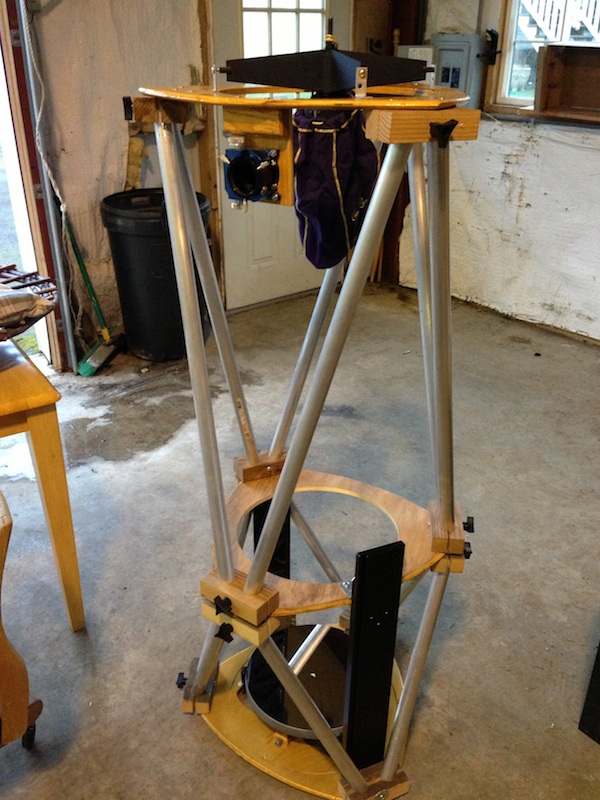
And just like that, Trixie was reborn.
I always pause for a moment before attempting to lift this OTA — I haven’t weighed her lately, but it must be 60#. I got the scope up on the mount, put the mounting plate even with the front of the saddle, and found the scope ever-so-slightly tail heavy. Putting in a 2″-to-1.25″ adapter and 32mm eyepiece, along with a finder, balanced it back out. A testament to the scope’s weight is right there on the CW shaft — beer can extension and all 3 counterweights. I think with a full imaging rig, I might need to pick up a 4th counterweight.
The mount just moves like silk once the scope is balanced. You’d think that it would start to complain a bit, carrying well over 100# in scope and counterweight, but it moved around like nothing.
Trixie is looking great, the mounting bracket seems to be holding well, and the NJP seems to be carrying the scope like it was born there. Now I just need some clear sky.
Welcome back to the world, Trixie!
One thought on “Trixie comes out of hibernation”