

I have been a nervous wreck for the past week, in anticipation of today’s events. I have been planning this building for almost 4 years, but this is really a point-of-no-return step.
First, a little background aside. When we moved into the house, there were a lot of random bits of stuff lying around; there was a throw rug set in the attic, a bunch of dimensional lumber scattered around the yard, and, in particular, a 10′ long x 24″ diameter Sonotube standing in the corner of the shop. As soon as I saw that tube, I knew that it was eventually going to be used for astronomy, and (as I have little interest in building a tube-style 24″ Newtonian telescope) I almost immediately earmarked it for the observatory pier. It is way overkill for the purpose — I can’t think of a telescope that will fit under the dome that’s large enough that it would require a 2-foot diameter pier.
However, I do like the idea of using a “found” item, and the feeling that the house itself provided a part of the observatory is amusing to me, so there you go.
As I said, I started planning this building before we even left California, so the 24″ Sonotube has stood in the corner of the shop, a promise to myself that I would eventually get the observatory done. That promise went unfulfilled for a long, long time. I got kind of used to seeing the Sonotube in the shop. So, it was with a strange mix of bittersweet pride that I watched as the tube got installed in its bracket, all ready to finally do its job.
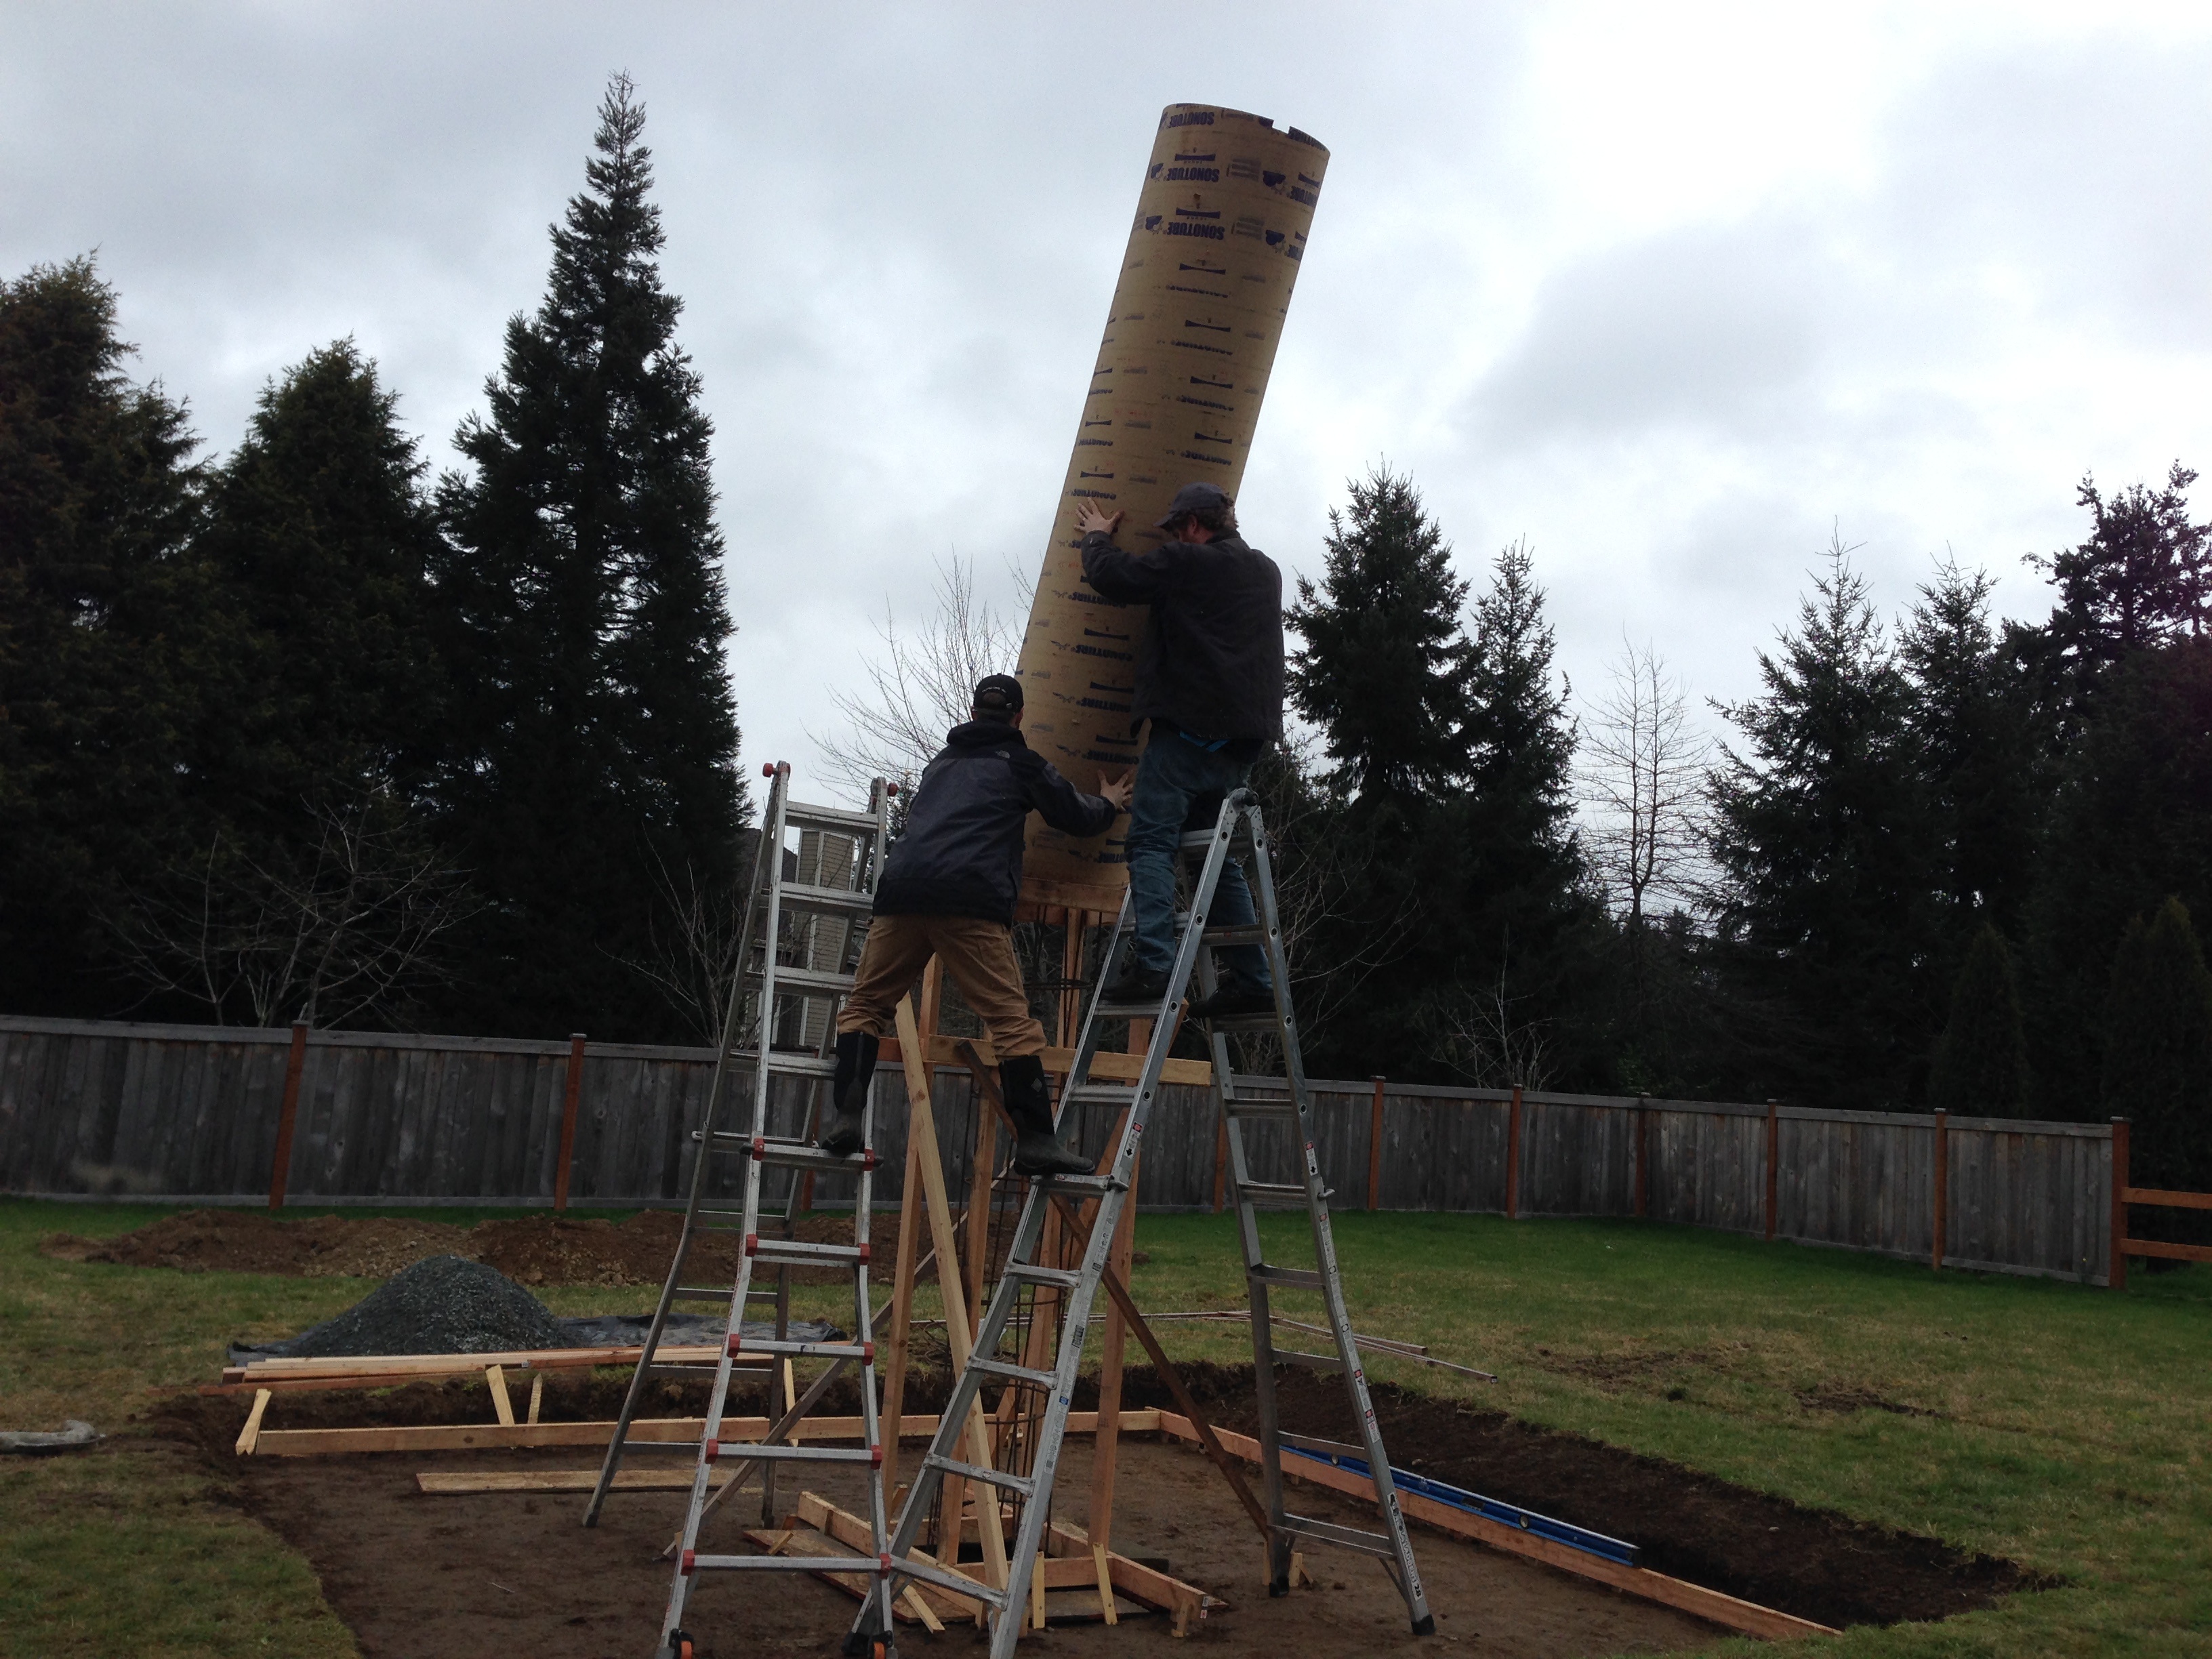
With the Sonotube in place, the next step was to get it aligned to North. Without wanting to be overly dramatic about it, this step is probably the most critical measurement in the entire build. Without a fairly-precise “North” bolt, aligning the telescope mount will be much more difficult. So, it was worth taking an extra few minutes to get the Sonotube aligned as closely as possible. I was gratified when Jared helped me to take the time to get the alignment done right.
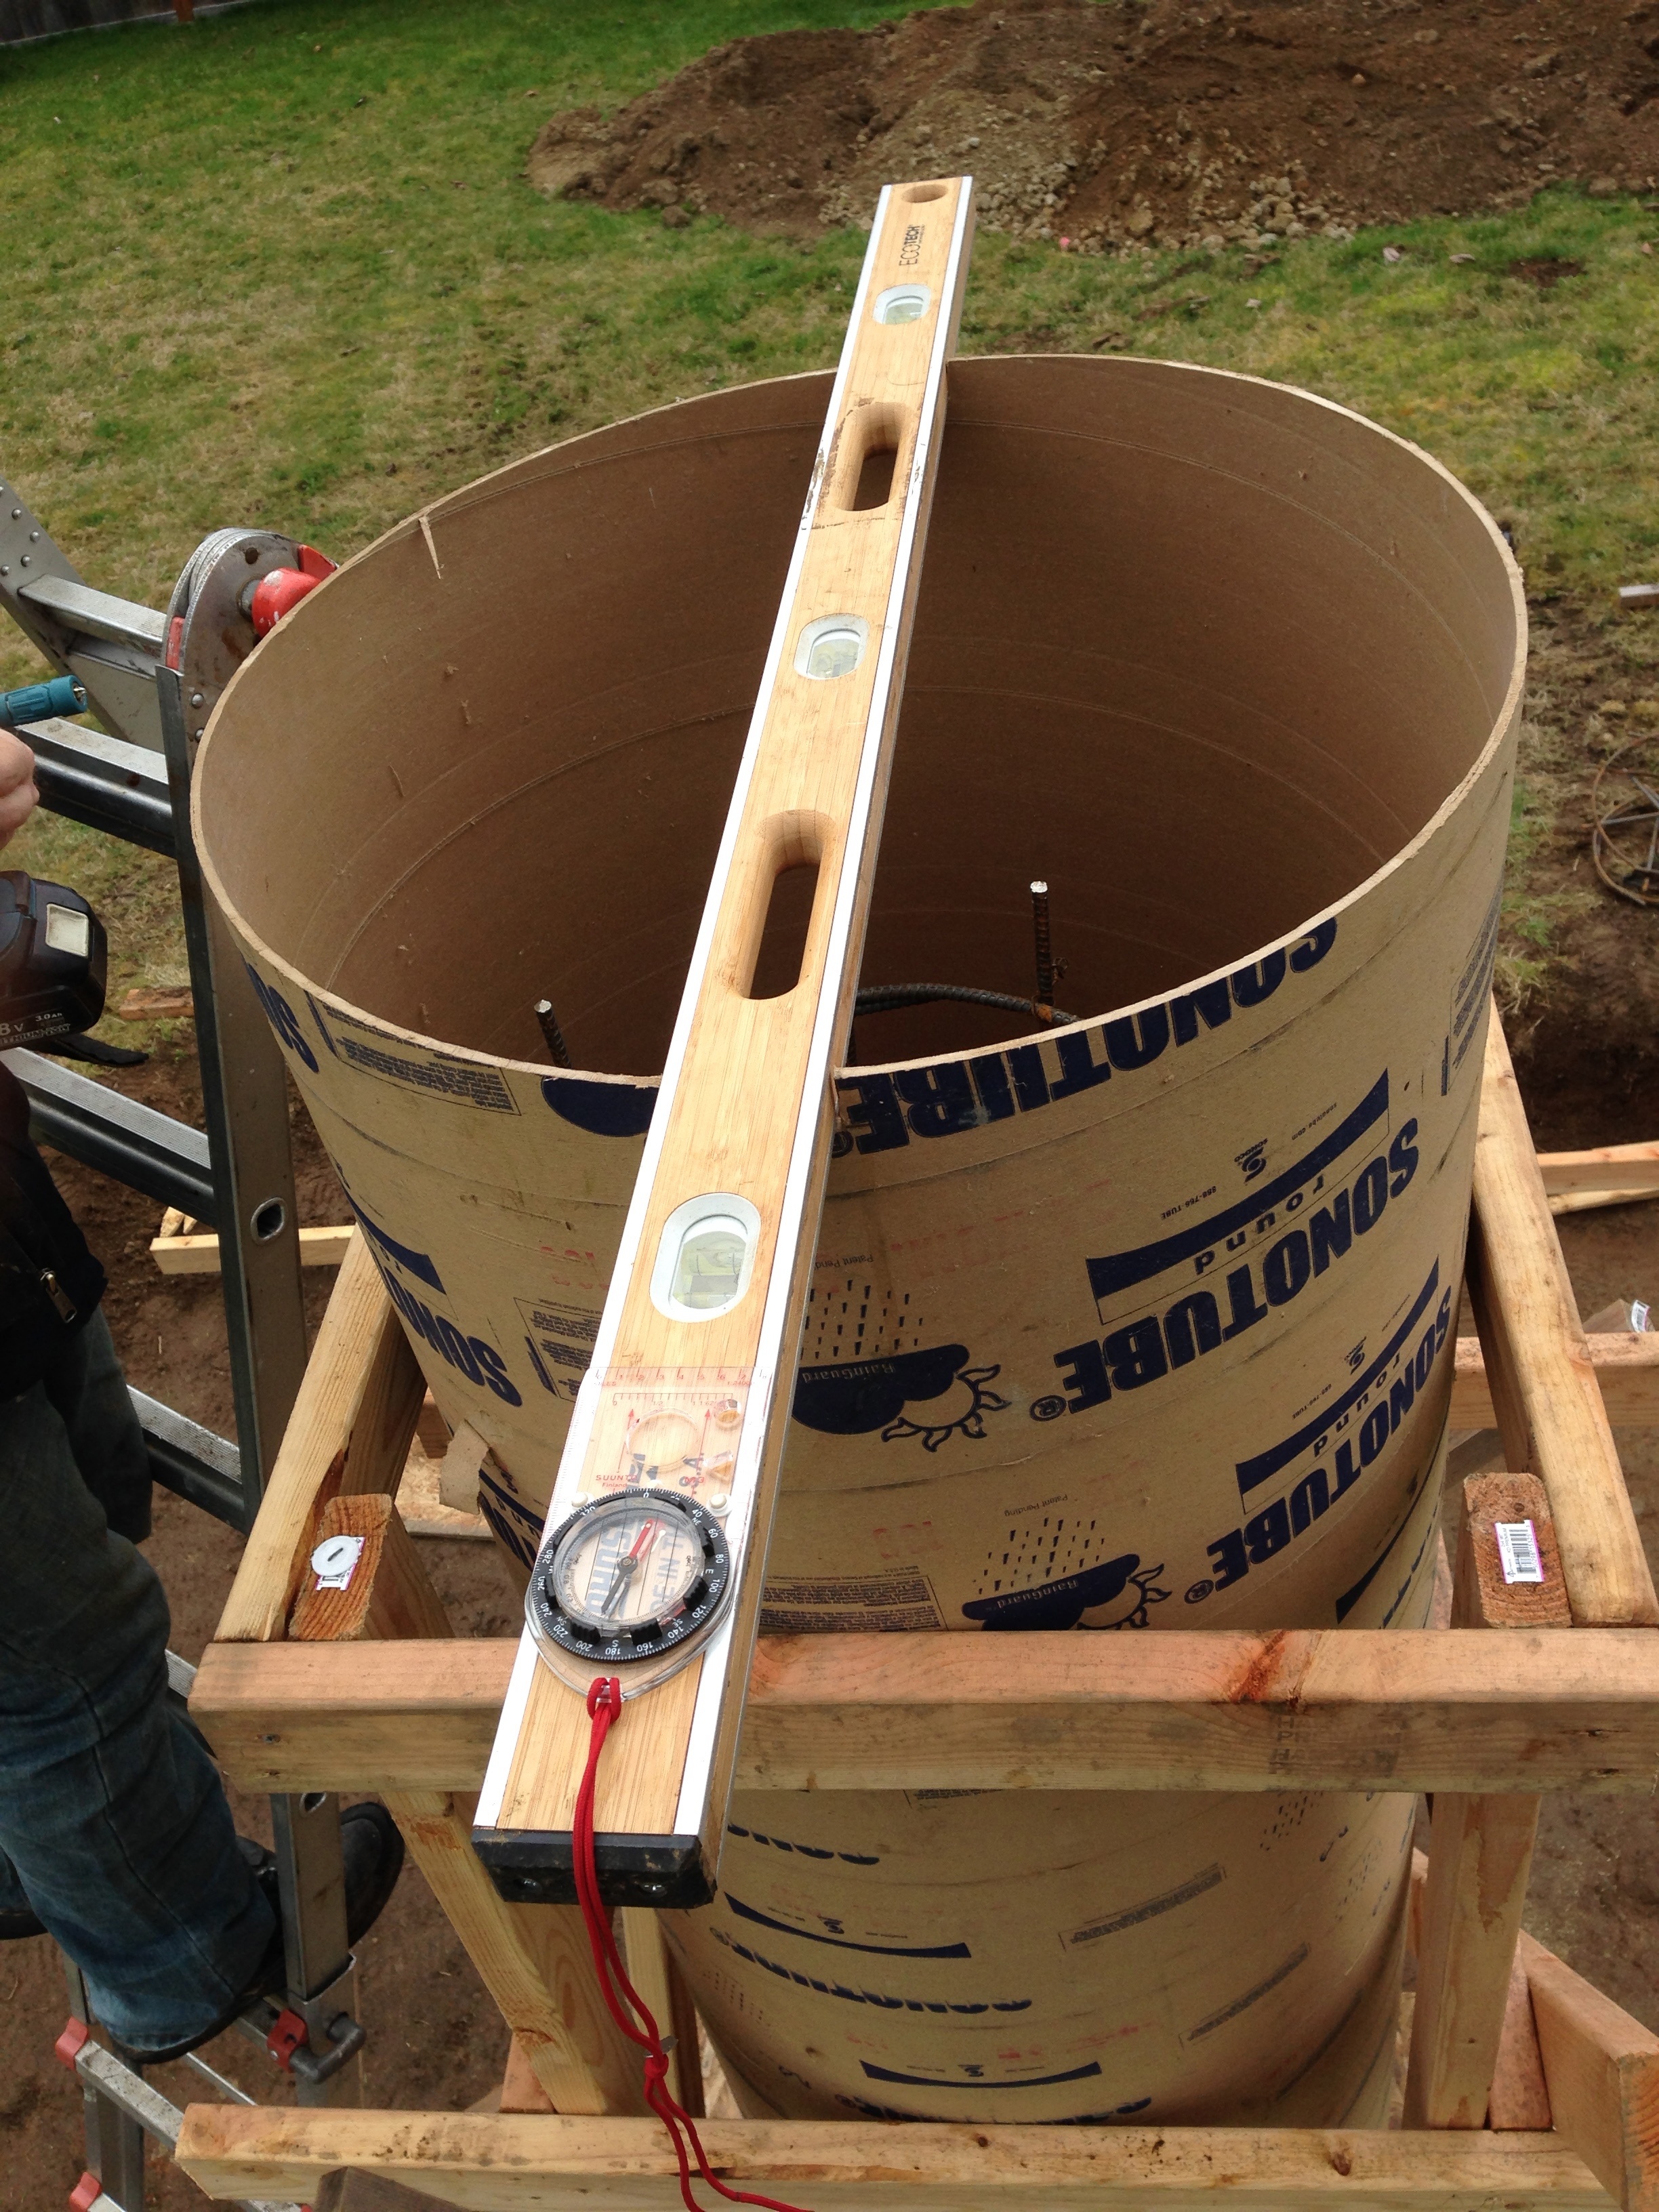
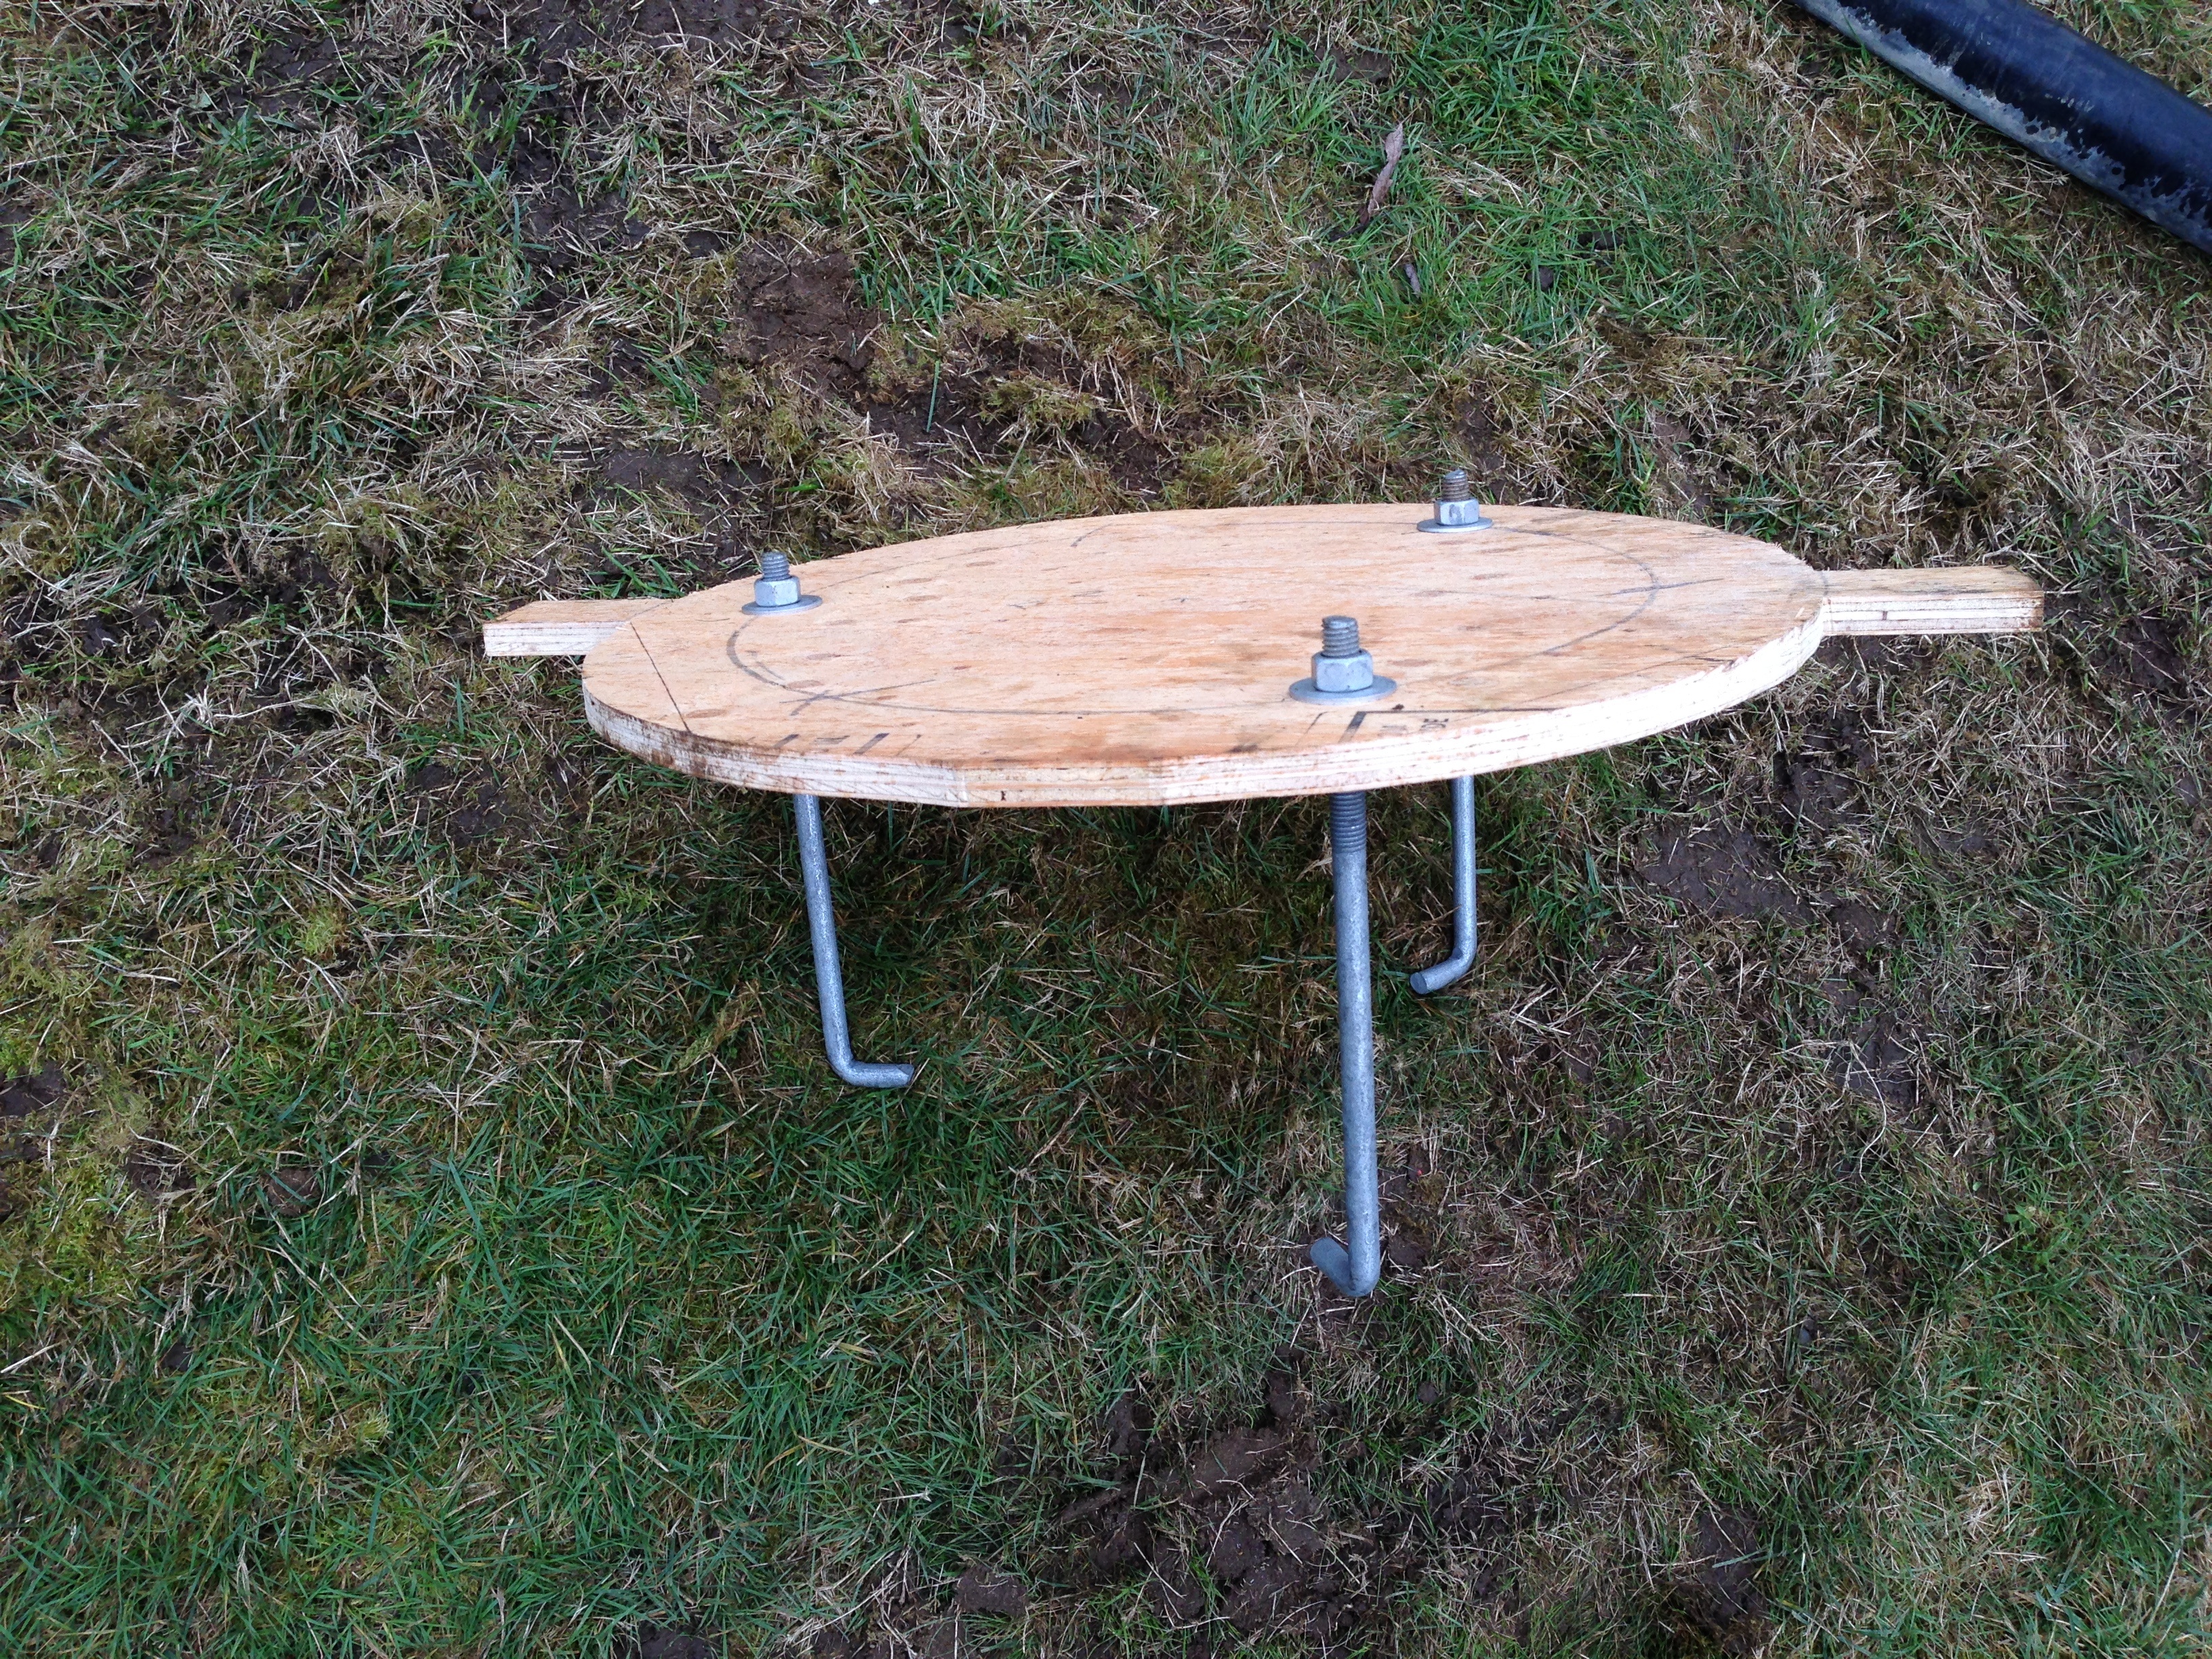
Note that Jared overruled my asymmetrical keyways, which made the alignment much easier, and worked out fine (as there was no question of putting the jig in backwards, since I was right there when it happened, as I will later explain).
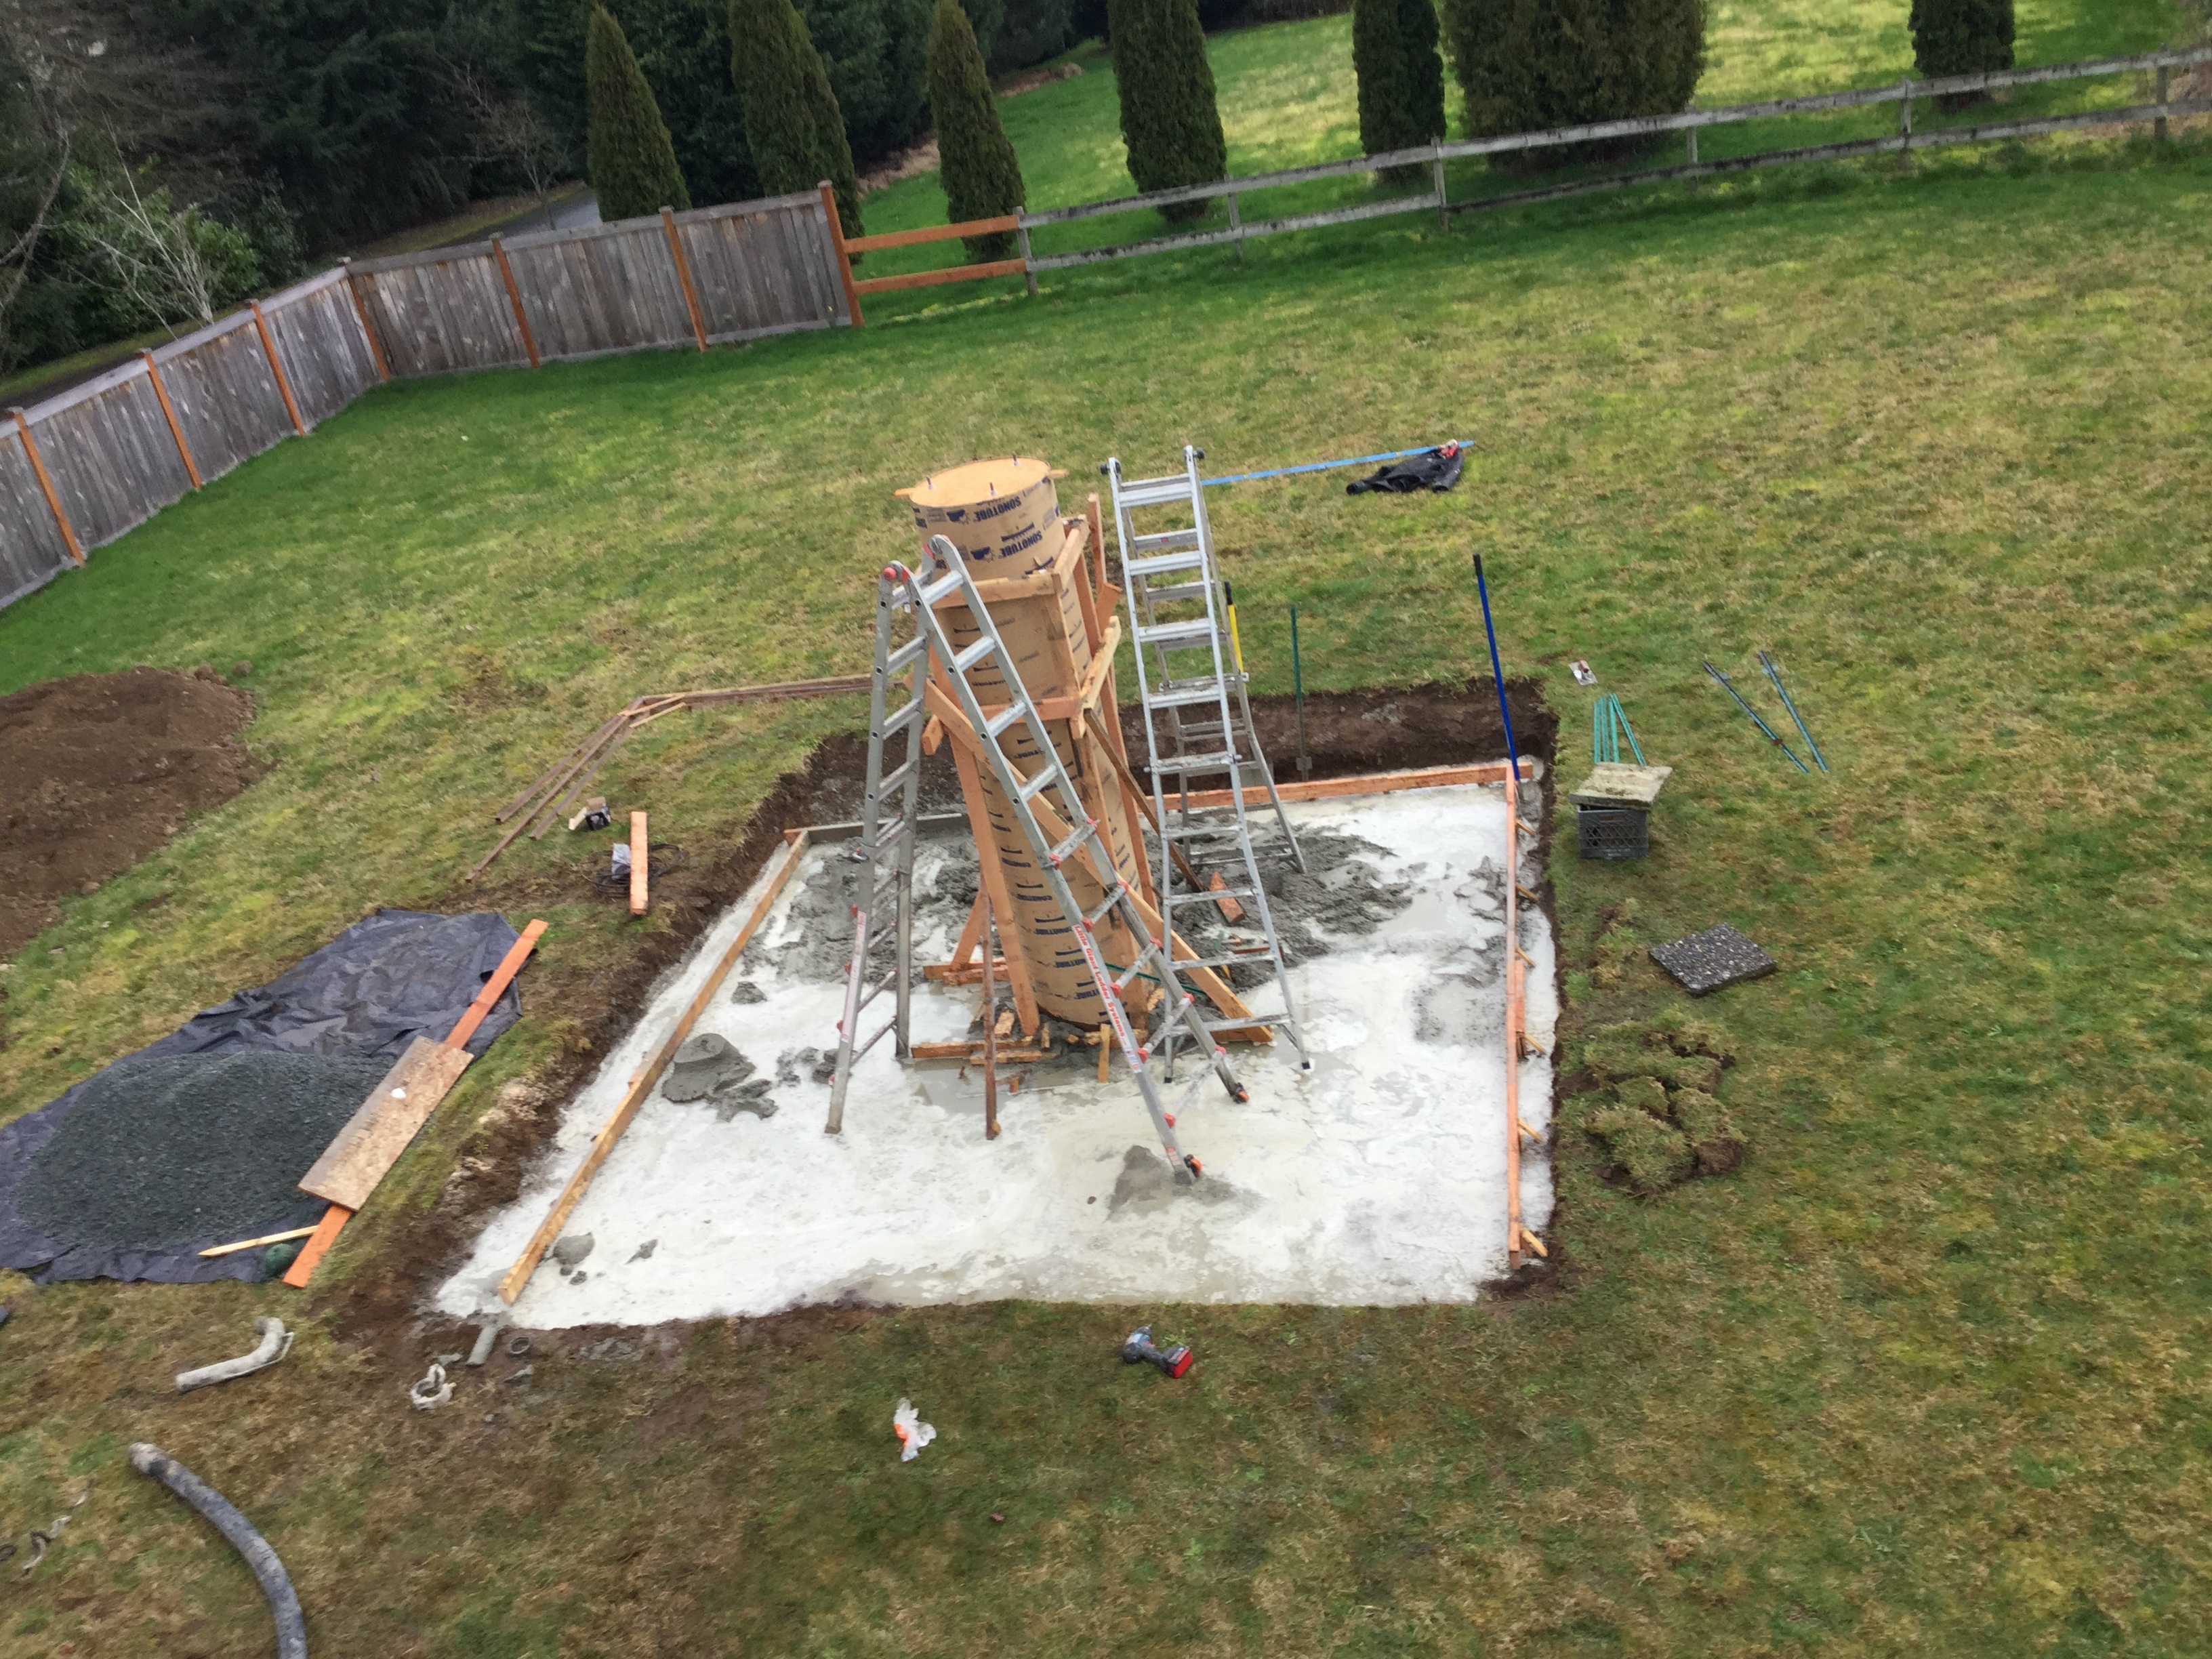
With the critical measurement complete, it was back to hurry-up-and-wait mode, until the concrete trucks showed up. Things were really starting to get exciting for me, but I took a little time to make sure to photos got taken (you would not believe how many photos I have, as no fewer than 3 devices were used to capture the day’s work).
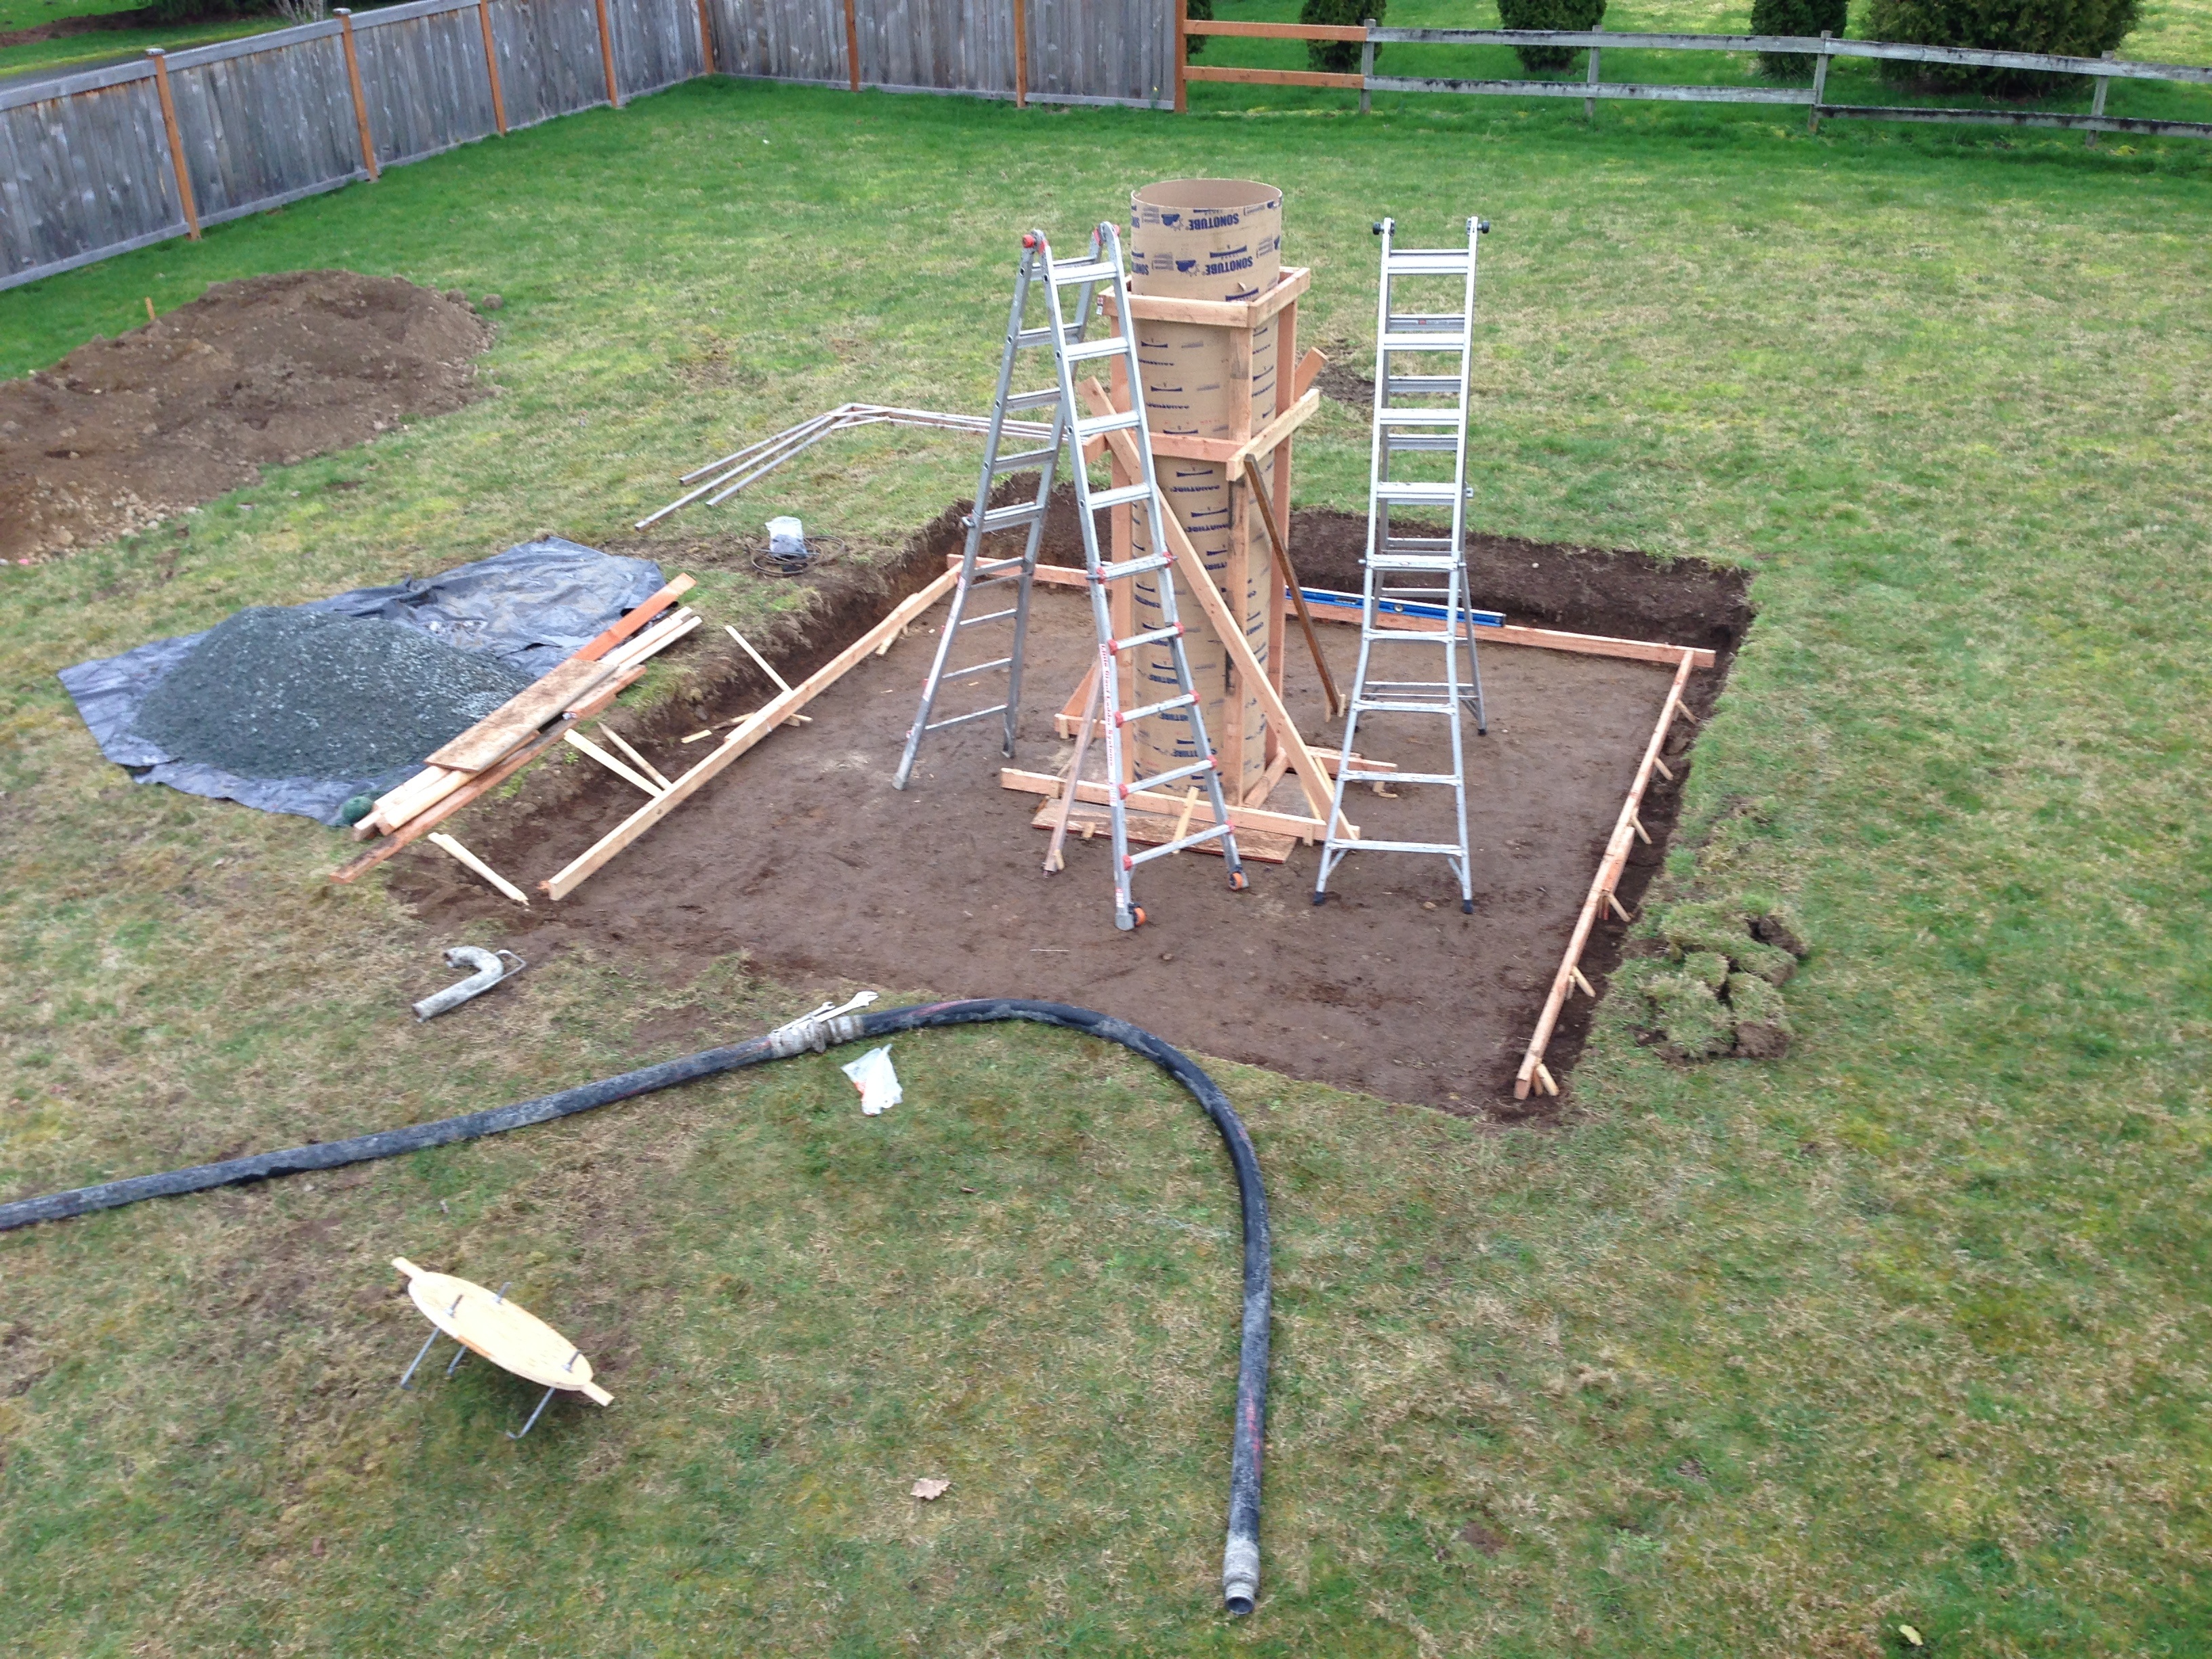
As the concrete and pump trucks showed up, and we got ready to start pouring the pier, we had a little time to let anyone who was interested take a look.
Here’s what B was looking at:
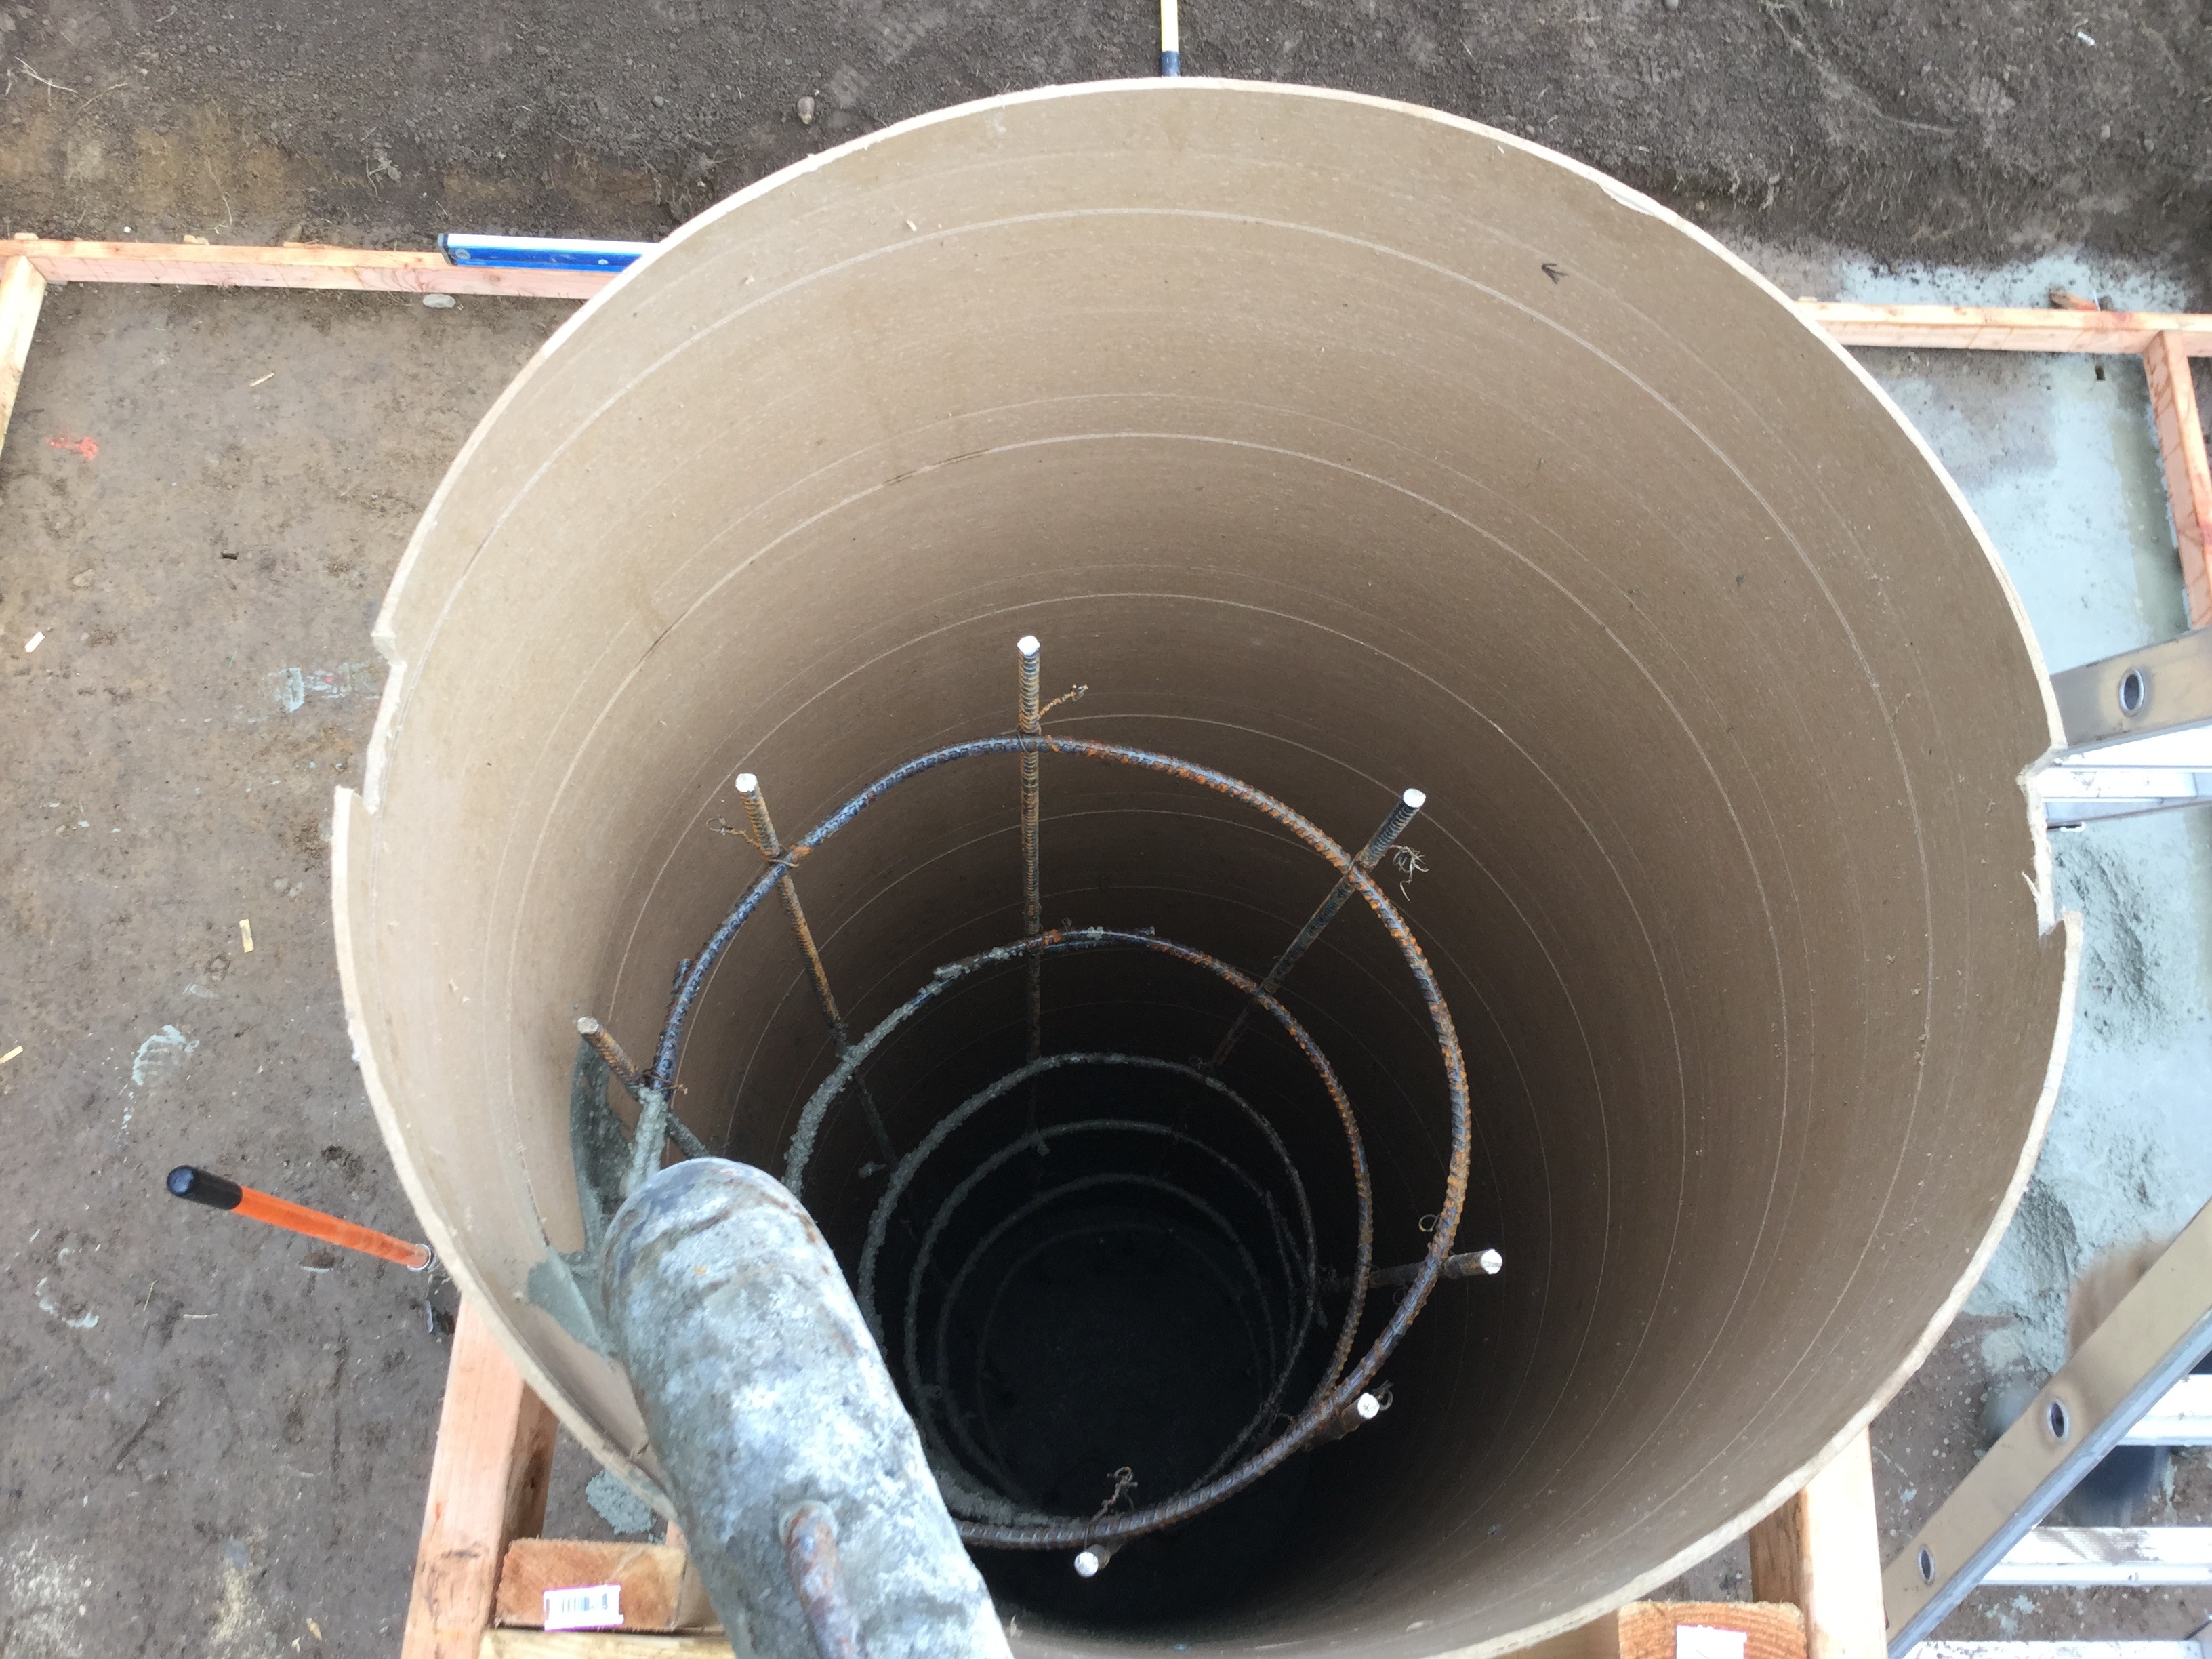
The rebar stops somewhat below the top of the pier, to allow room for the J-Bolts to fit. The metal elbow was a very cool little gizmo that made the actual pumping operation easier to deal with.
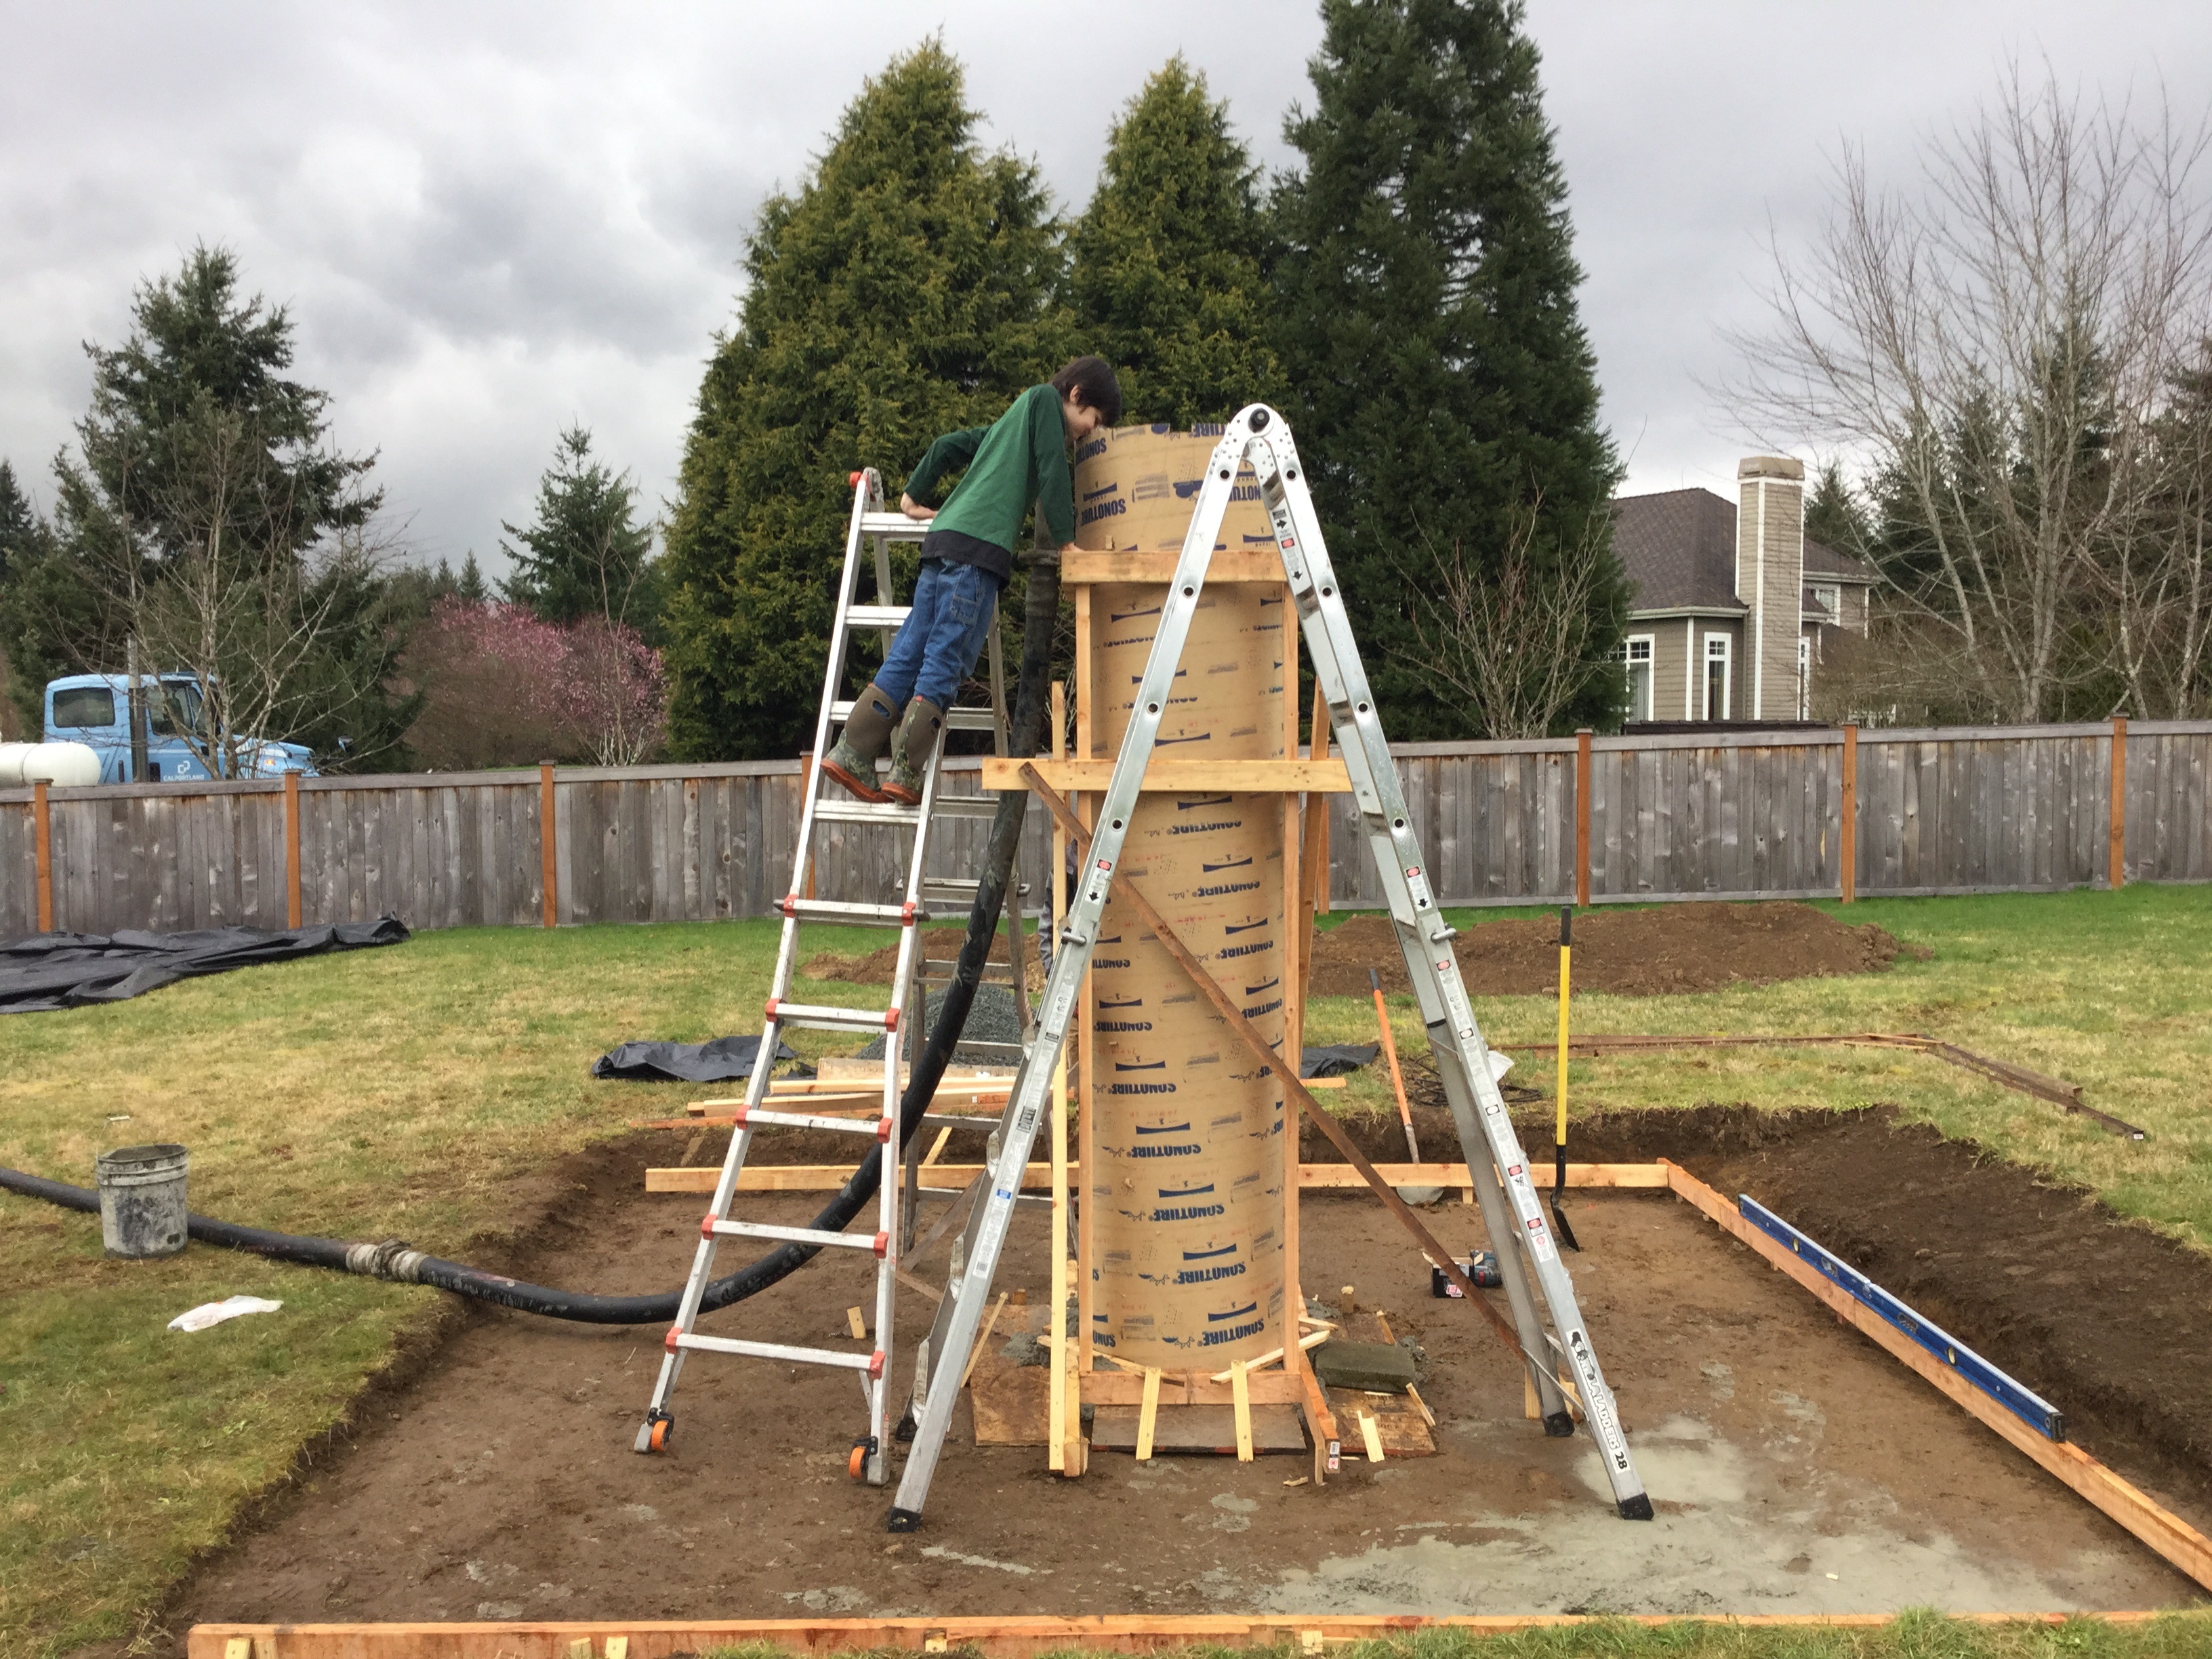
I grabbed a lot of photos of the whole works, but here’s an attempt to capture the whole exciting jobsite scene.
The pump truck added the critical ability to lift the concrete up 10′ in the air to fill the pier, although this particular one has a strong enough pump to pour 7 stories high. We ordered a short load in the mixer truck, and what with one thing and another, we ended up using most of it.

Before the pier was full, I had a chance to grab a shot of the J-Bolts before they got installed. I am so happy about the keyways on the jig. It made everything so easy to get exactly right. Jared even moved the bolts around a little bit, when we ended up with 1/2″ more concrete in the Sonotube than we had originally planned. It’s little touches like this that make a big difference in complex builds. Thanks, Jared!
Once the pier was full, Jay (also of Carbide CS) troweled off the upper surface. I belatedly decided to carve some text into the wet concrete, but I neglected to take a photo of it before the bolts went in. If I did it right, I should have plenty of time to take a photo, as the text should be there once the pier is cured, and after that, of course… forever. 🙂
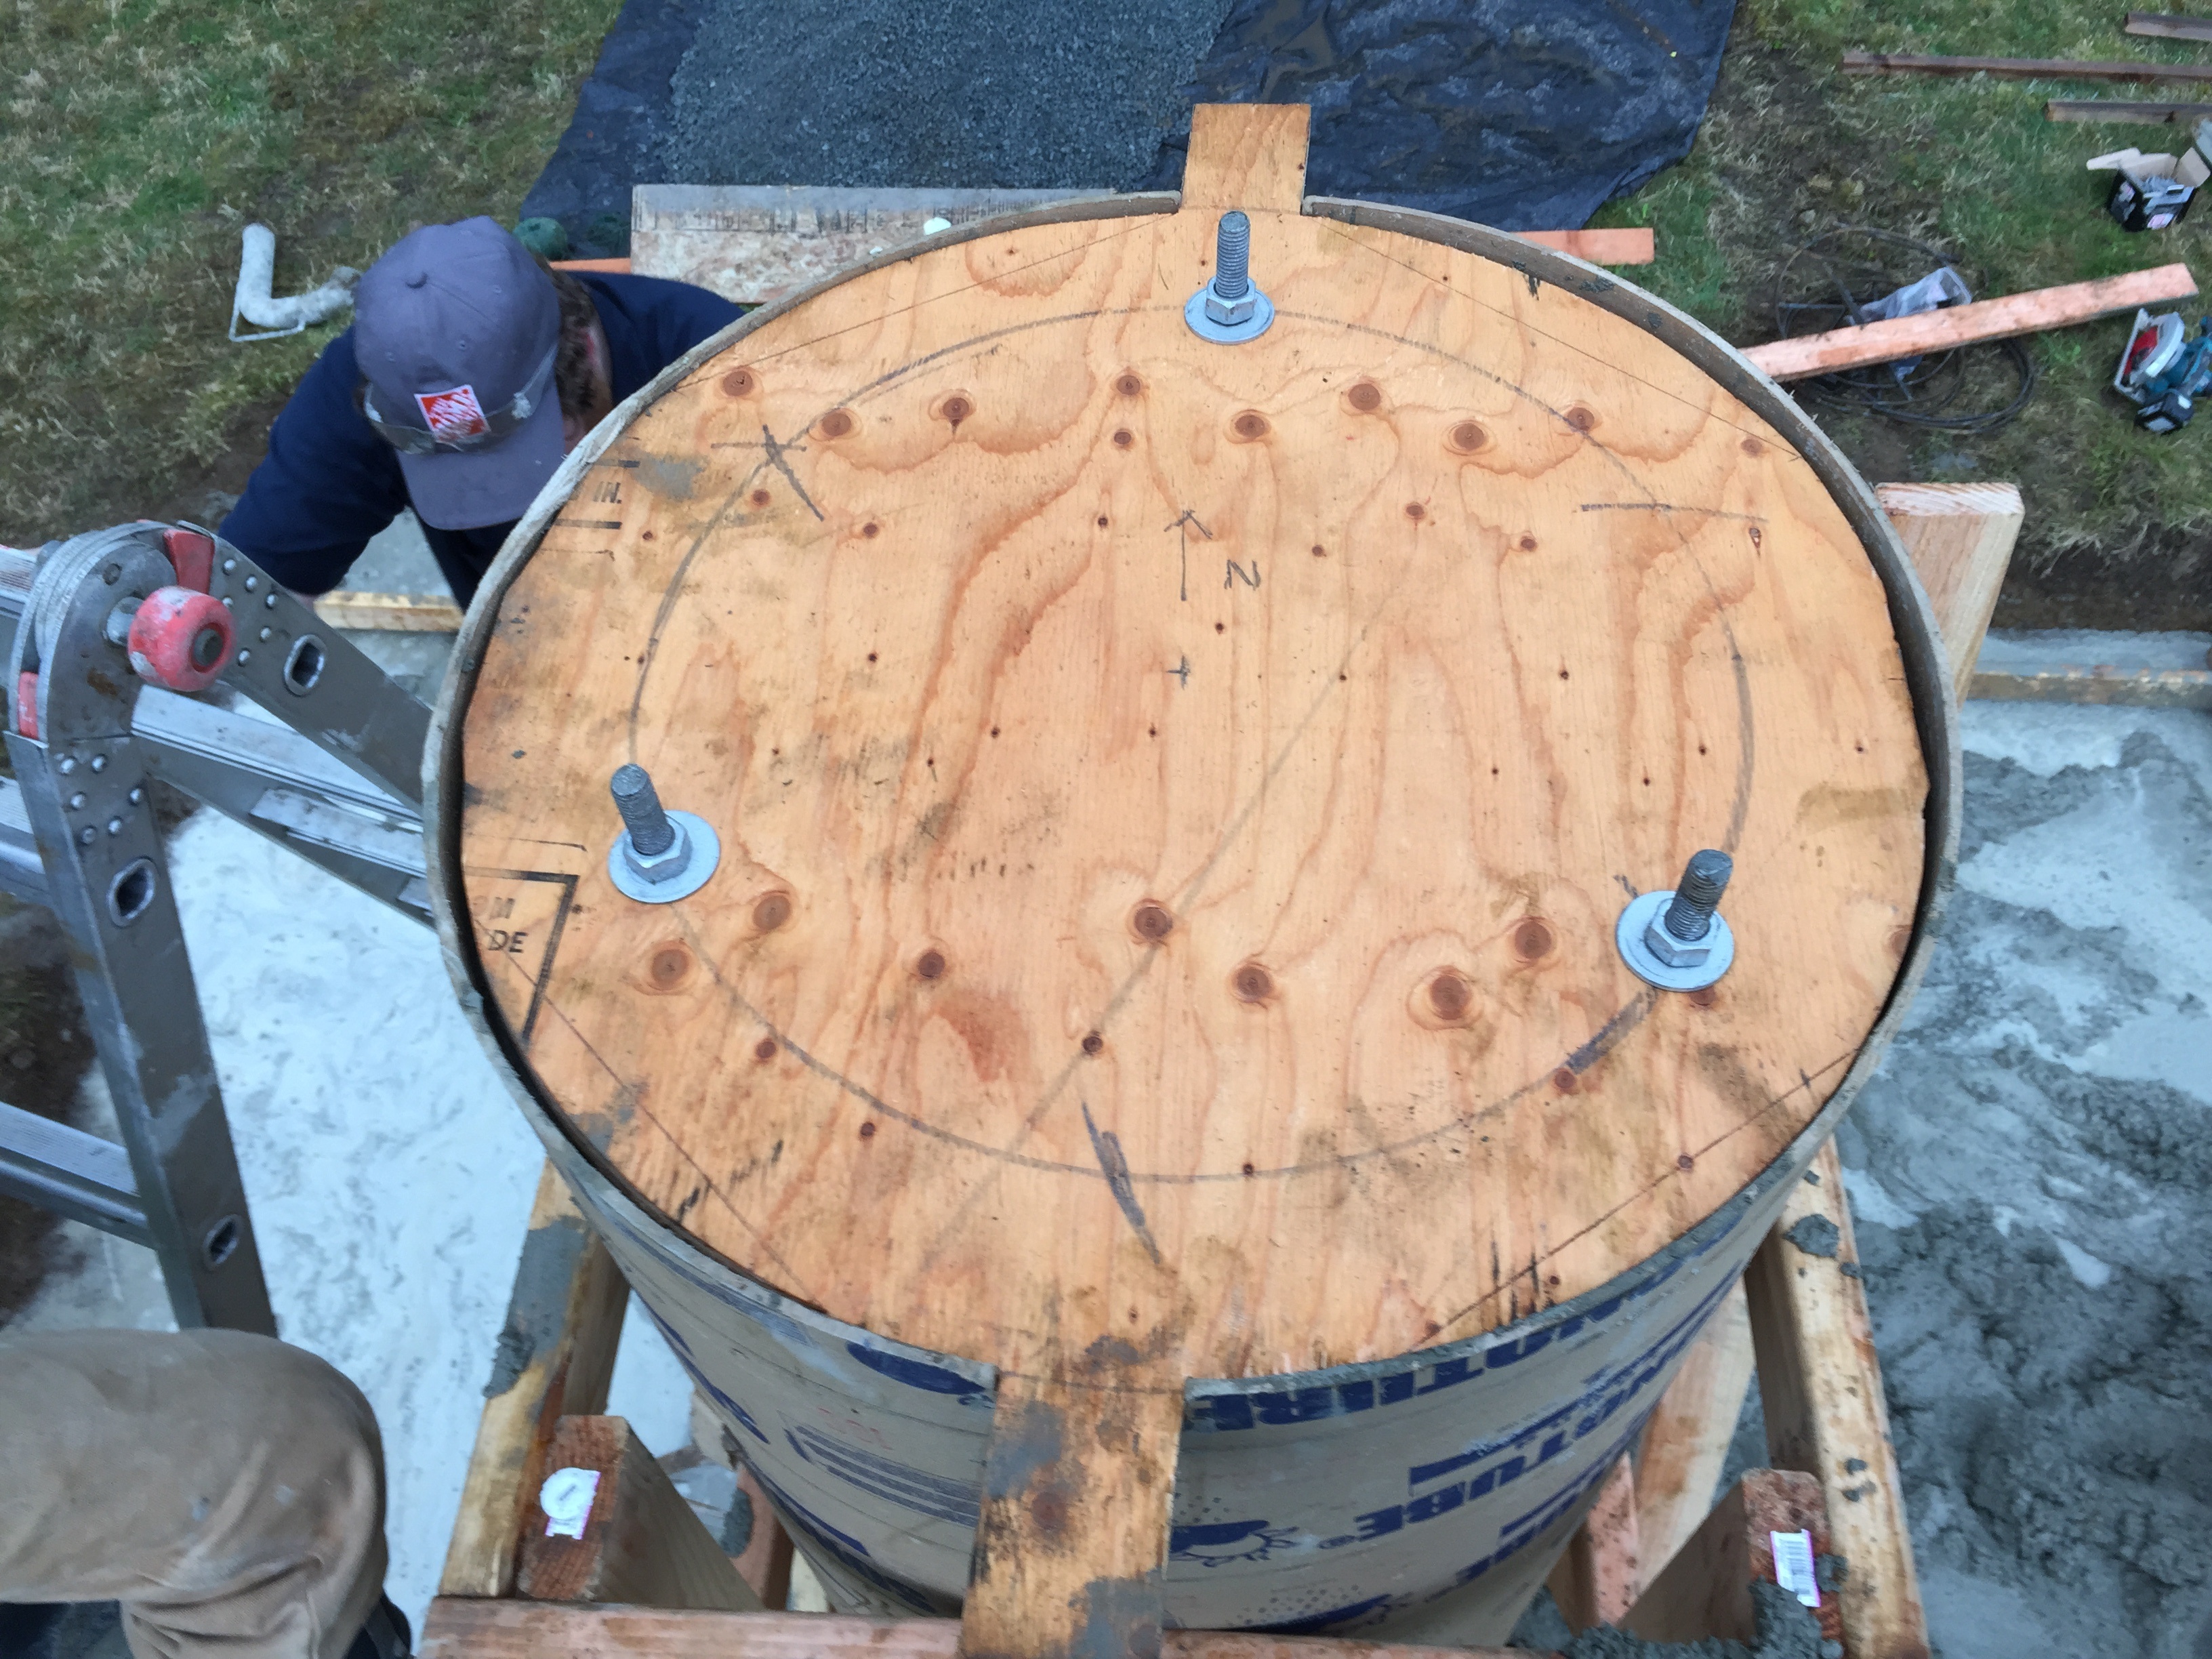
Troweling done, my vanity appropriately massaged, it was finally time to install the J-Bolts. The jig went in without a hitch; I cannot say enough good things about how well this part went.
With the bolts in, the pier is official. It’s going to sit in its cardboard jacket for 5 days or so, and then anytime after that, the pier forms can get removed, the pad forms can be finalized, and the pad is ready to be poured.
Stay tuned, more concrete to come in a few days.
Nice job Jimbo. who is Jared?
Looking forward to seeing it next week.
Looking forward to seeing you guys. We may even have a pad by then, if it stops raining for a day or two. Ah, Seattle in February. 55 and drizzly. Jupiter blazes in the east at sunset, and Mars and Venus are a nice pair high in the West. The moon is getting bright enough to see through thin clouds. Perhaps next week’s full moon will bring some clear sky with it.
Jared Smith, of Carbide Construction Services, is the general contractor for the Observatory 2.0 build. He really seems to know what he’s doing, keeps up great communication, and is very engaged in the successful design, build, and completion of the building.
I look forward to working with Jared to get this shed done.