

Well, that is satisfying in a way that’s hard to describe.
After thrashing for nearly 2 years over how to install limit switches in the dome’s shutter, I finally started making progress over the weekend, when M_ came over to think things through with me. By the time he left, I had a plan of action, and all I needed was a little non-rainy weather (the “I’m open” magnet needed to have some drill holes added to the front shutter), and a few hours to grok it.
I spent an evening building and refining the circuit, another picking up supplies at Vetco, and finally, this evening, I decided to push forward and get everything installed.
First, I installed the relay base and the terminal-strip-with-diodes, which involved some precision drilling. Then, while the drill was still ready to roll, I decided to bite the bullet and drill the holes in the shutter. The clouds were thinning a bit, so I hoped for no sudden rain squalls, and voila, the holes were in. (If I had a helper, there would be more pictures; sorry). I then climbed out on the roof to silicone the bolts in place (that’s the part that needed no rain), and got the magnet installed.
Then I sat down for the main work of the evening, measuring and cutting and crimping ends for the 5 jumper wires that needed to go in. Once I started this process, it needed to get completed, because the shutter would no longer work normally until the whole circuit was in. This all went well, it was just time-consuming. With the jumpers in, I put the ends on the limit switch wires, and got them labeled (totally forgot about the “normally-closed” nature of the switches, and had to re-label one of the wires :facepalm: ).
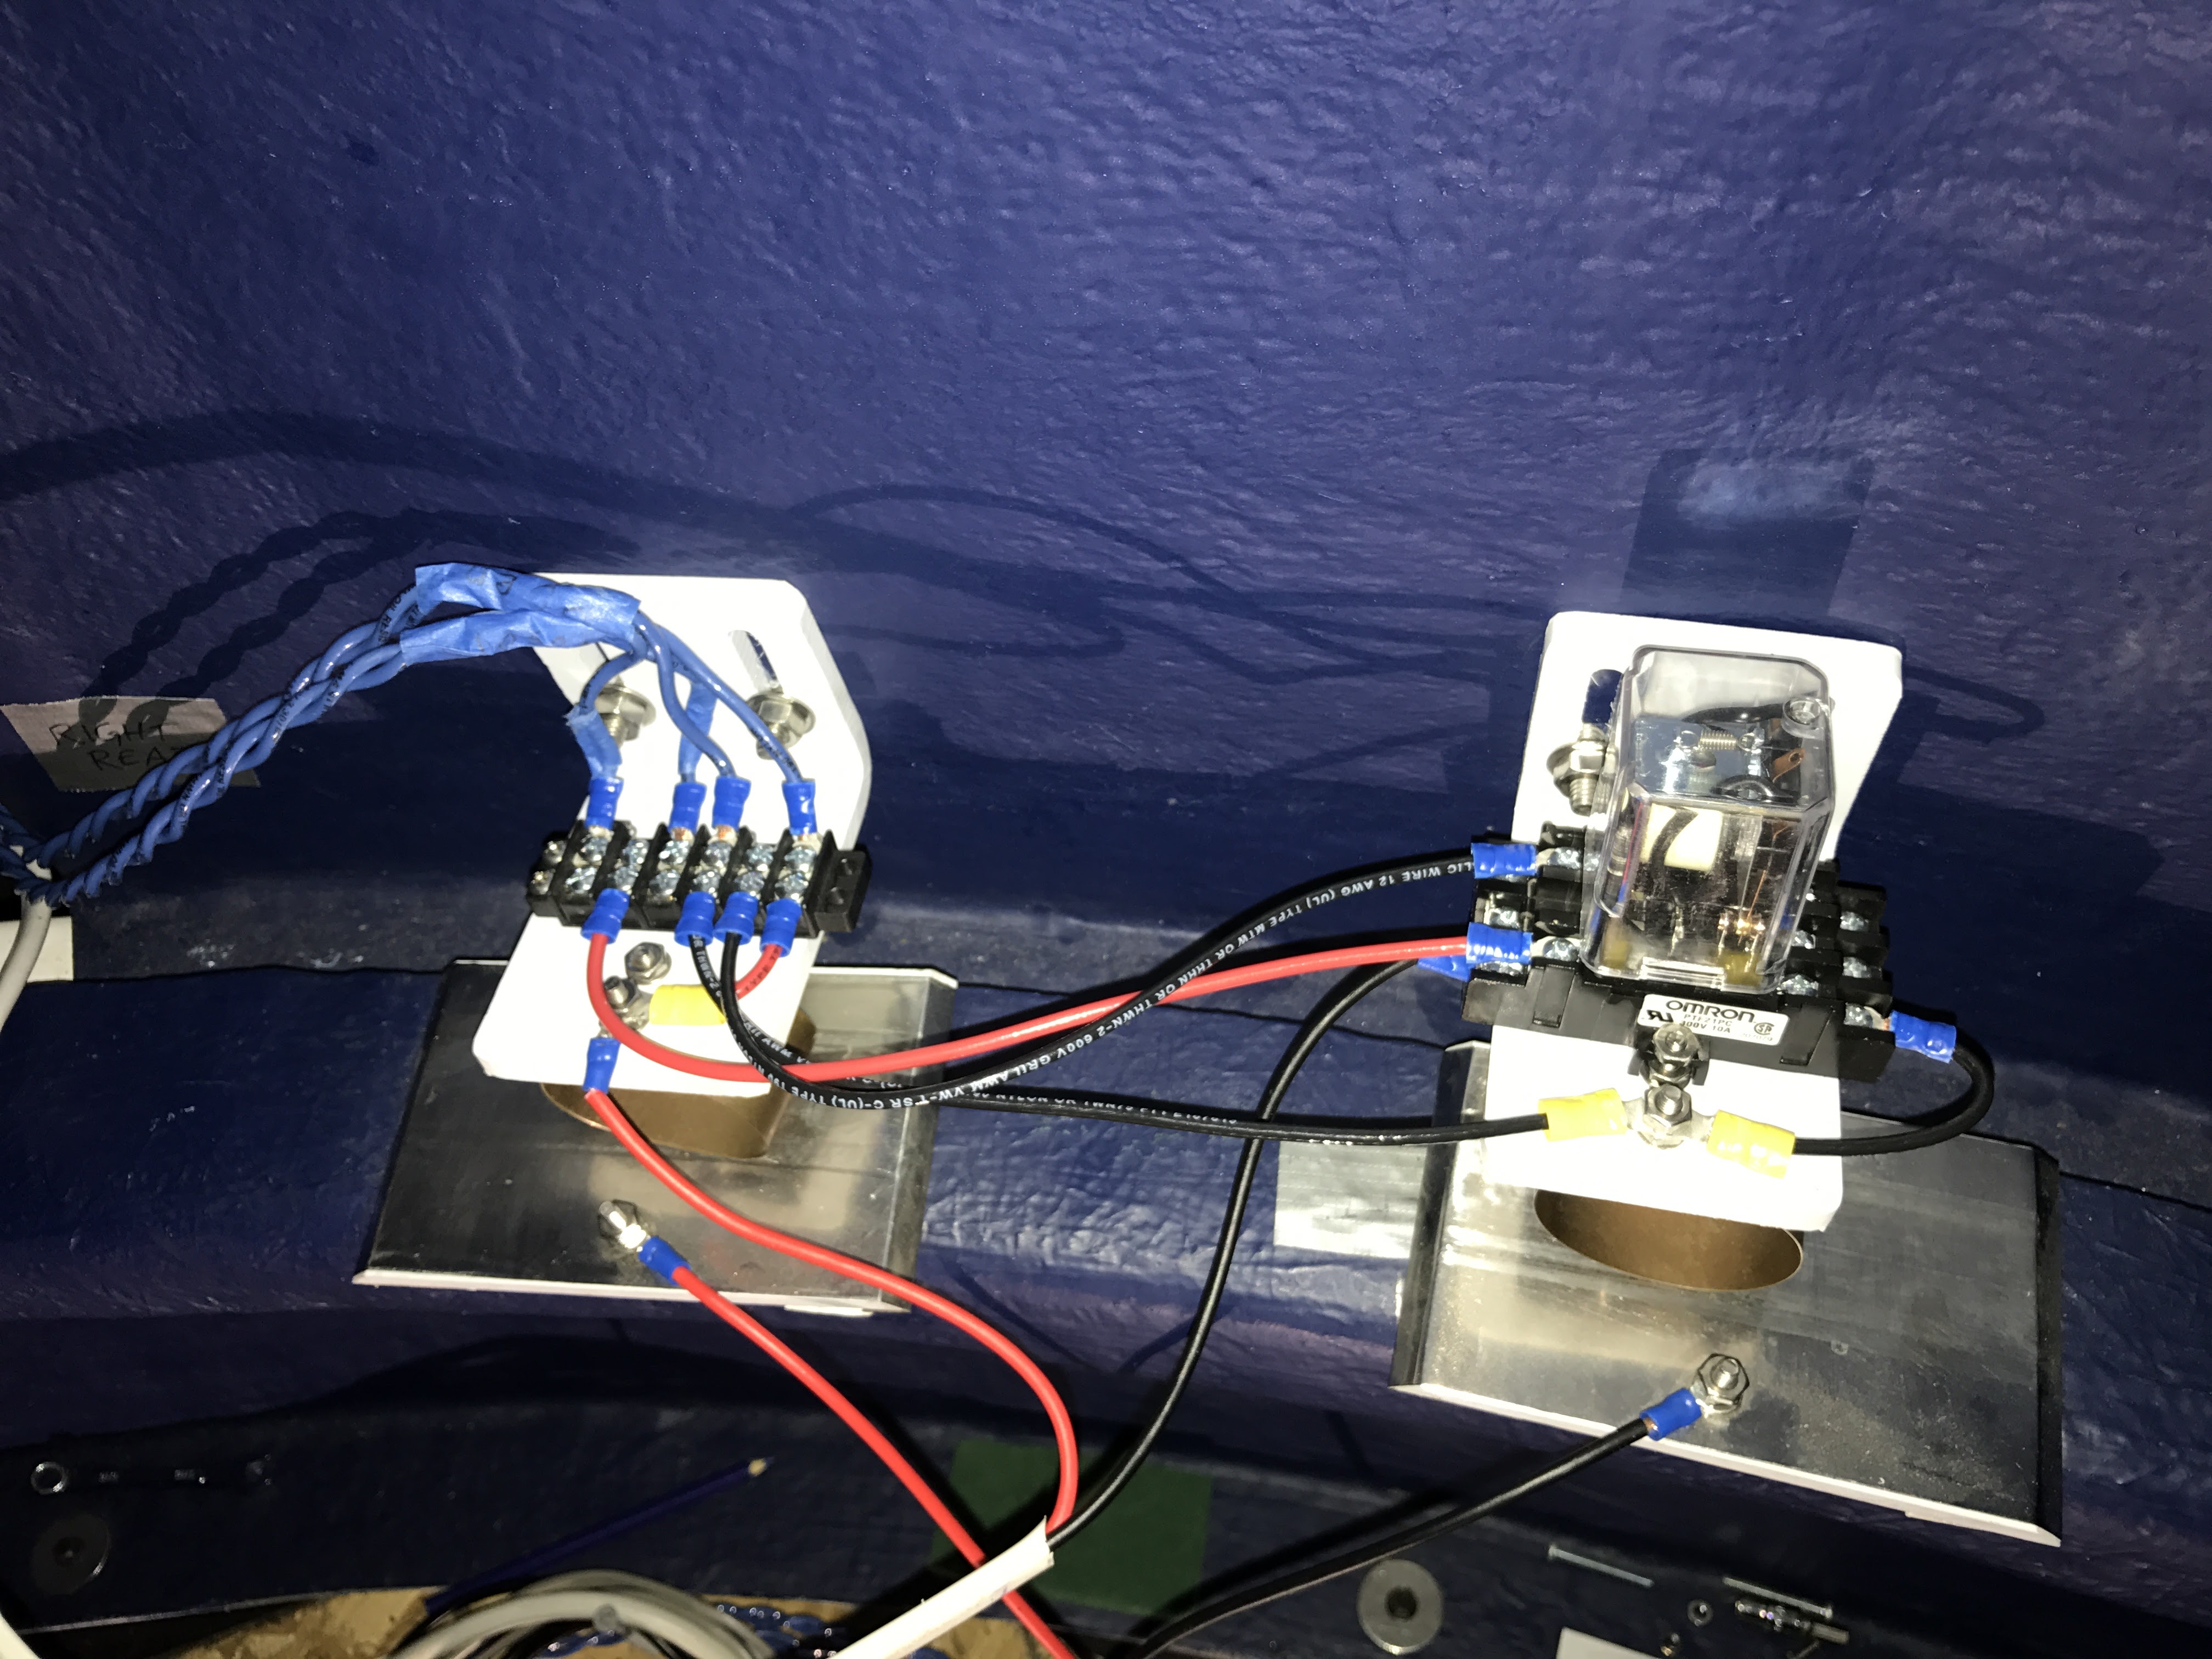
At this point, I had the “Open” limit switch completely installed, but the “Closed” one needed to be Sugru’d in place (I’ll get to that in a sec). So I gave the shutter a test, got it about 3/4 of the way open, and started poking around for someplace I could attach the DMM to check continuity, and realized that, if the circuit is working, I wouldn’t need to do that…
Click here for the test result!
The video is me holding down the “open shutter” switch, and the limit switch cutting the circuit off at the appropriate time. The clicking at the end is me toggling the switch to confirm that it won’t open any farther.
In a stroke of irony, when the shutter opened, I could see Sirius, because the sky had completely cleared at 11:30pm. In a word, Srsly?!
I almost called it a night at this point, but I was so close to being done that I decided to press on and get the “Closed” switch installed. I’d bought some Sugru to install the “motto” buttons over Christmas break, and I’d specifically left the Blue packets for things that needed to be installed into the dome. I pressed a pair of vise-grips into service to hold the switch wire in place (which helps to stabilize the switch while the Sugru cures), and just like that, the switch was in.
I needed to close the dome anyway, so why not give the switch a test?
I love it when a plan comes together.
The “Open” position has a bit of wiggle room; there is a range of about 3″ to 6″ that I would have been satisfied with. The “Closed” position, however, has an extremely tight tolerance; you want the French Cleat to be overlapping the rear shutter, but it only has an overhang of about 3/4″. So it was important to make sure that the switch didn’t stop things too early (which would leave the dome possibly in trouble in high wind), or too late (which could destroy the shutter cable). M_ and I spent quite a few moments trying to get this position correct, and I’m happy to say that things worked out… well, pretty much perfect.
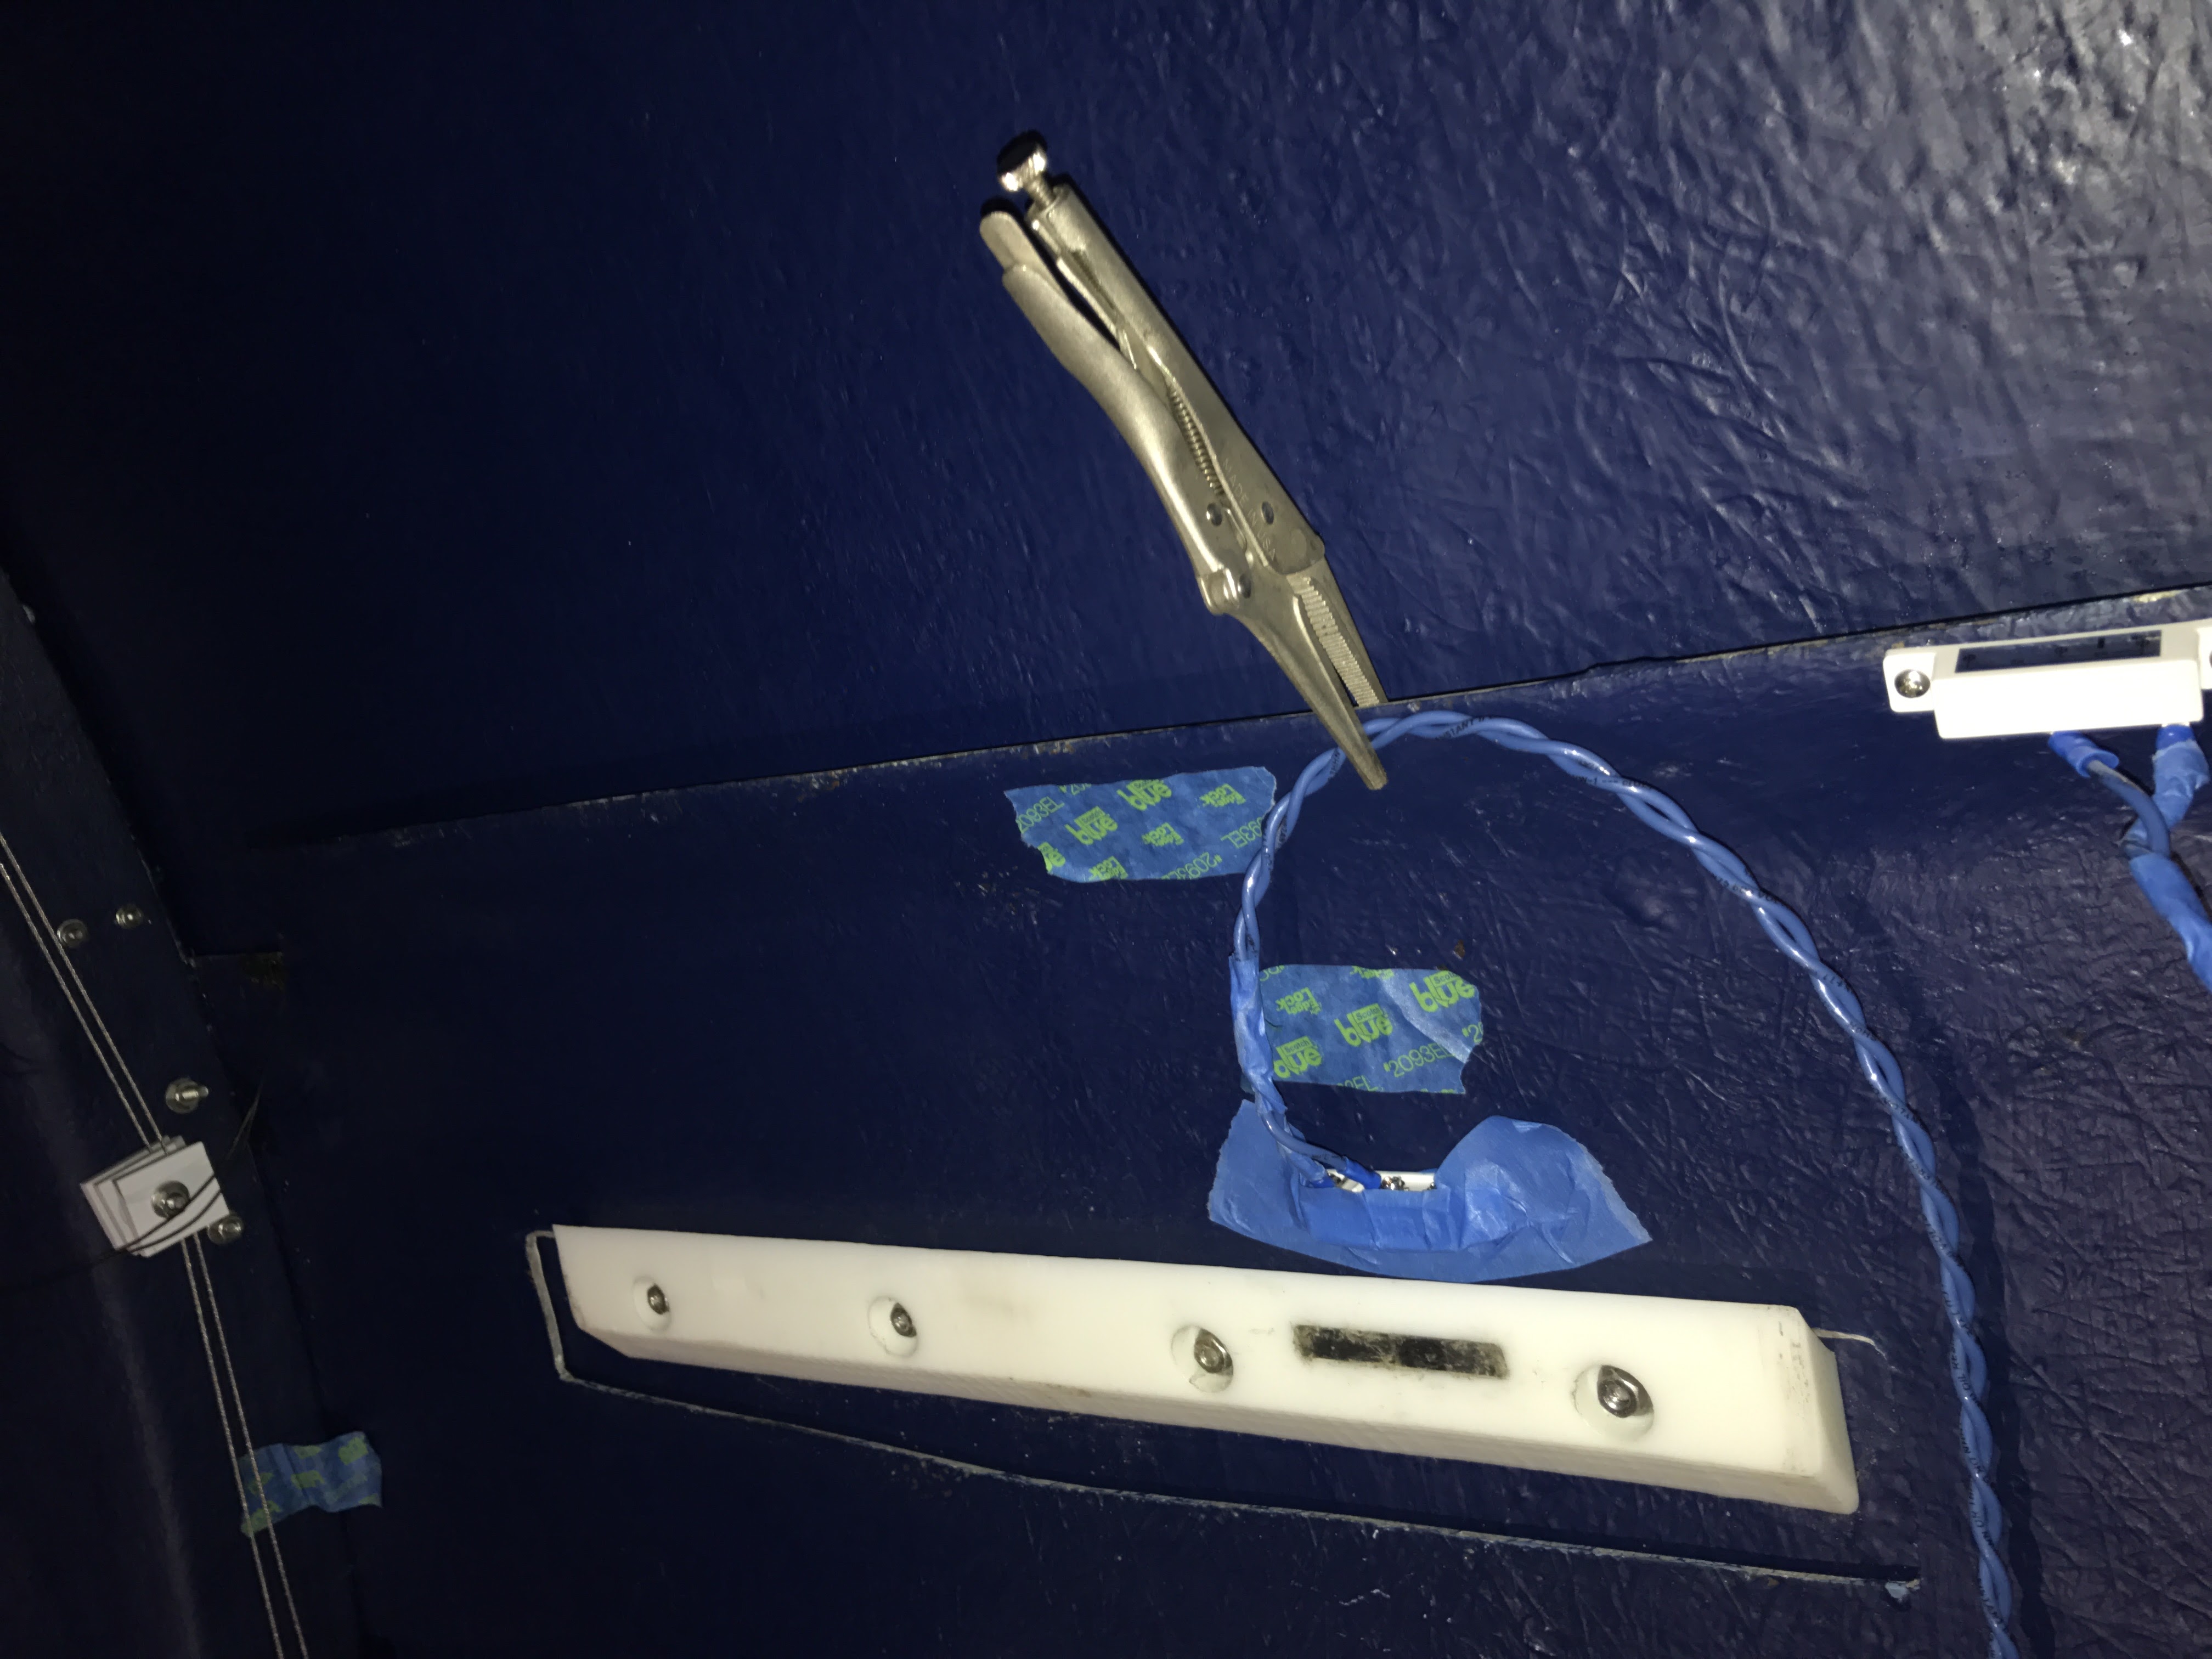
The switch is covered in blue painter’s tape while the Sugru is doing its thing.
So it’s now impossible to open the shutter too far, or close it too far. I have to turn the shutter control settings on in software, but at this point, I can confidently say that the dome is now completely installed. All the other observatory systems can now treat the dome as a fully automated unit.
Bring on the cloud sensor!
One thought on “Dome automation – We control the vertical”