Dust, there’s a new Deputy in town

I didn’t really spend a lot of time thinking about sawdust before I built the CNC machine. Now, I think of little else.
Everything in the garage is covered in a fine layer of sawdust.

So, I have been thinking about putting in a dust collection system , and hooking it up to all the power tools. The router table and chop saw already have dust collection ports. The CNC machine, of course, just awaits my customization. The question is how to get the Shop Vac involved; the sheer amount of dust that comes in blocks up filters very quickly, and any larger particles get stuck in the 1-1/4″ hose.

So I started looking around for solutions, and ran across The Dust Deputy. It’s essentially a cyclonic pre-filter for the Shop Vac; it whirls the incoming dust around, and dumps all the heavy stuff into a 5-gal collection bucket, instead of into the Shop Vac’s filter.

A friend of mine bought me a Dust Deputy for Christmas this year. w00t!

I had to spend a little time scratching my head figuring out how to get the thing working. I needed to pick up a bunch of vacuum hose as well as a bucket, lid, gasket, and bolts. One nifty thing that I discovered is that, although my Shop Vac came with 1-1/4″ attachments, it actually supports 2-1/2″ attachments as well, so I converted everything to the larger hose diameter. grunt. More power.

I pressed the CNC machine into service to cut the bolt pattern (it’s a 6-bolt hexagon pattern — more trig! Yay!) and hole in the lid of the bucket. Note to future self: CNC machine will cut rubber gasket, but gasket needs to be held down with something stronger than blue painter’s tape. Despite my best efforts, the CNC cut was not perfect. But it’s more than close enough to do the job, so I bolted everything together, and set about cleaning up all the sawdust that I had created last weekend while rebuilding Trixie (plus the extra from this weekend’s Dob conversion and the test cuts I’d done for the Dust Deputy lid…).

In short, it did great! I haven’t checked the Shop Vac’s chamber yet (and it had a little sawdust in it anyway), but the Deputy seemed to be doing its whirly thing, and the bucket is definitely heavier. Also, there’s a *lot* less sawdust in the garage. Very cool.

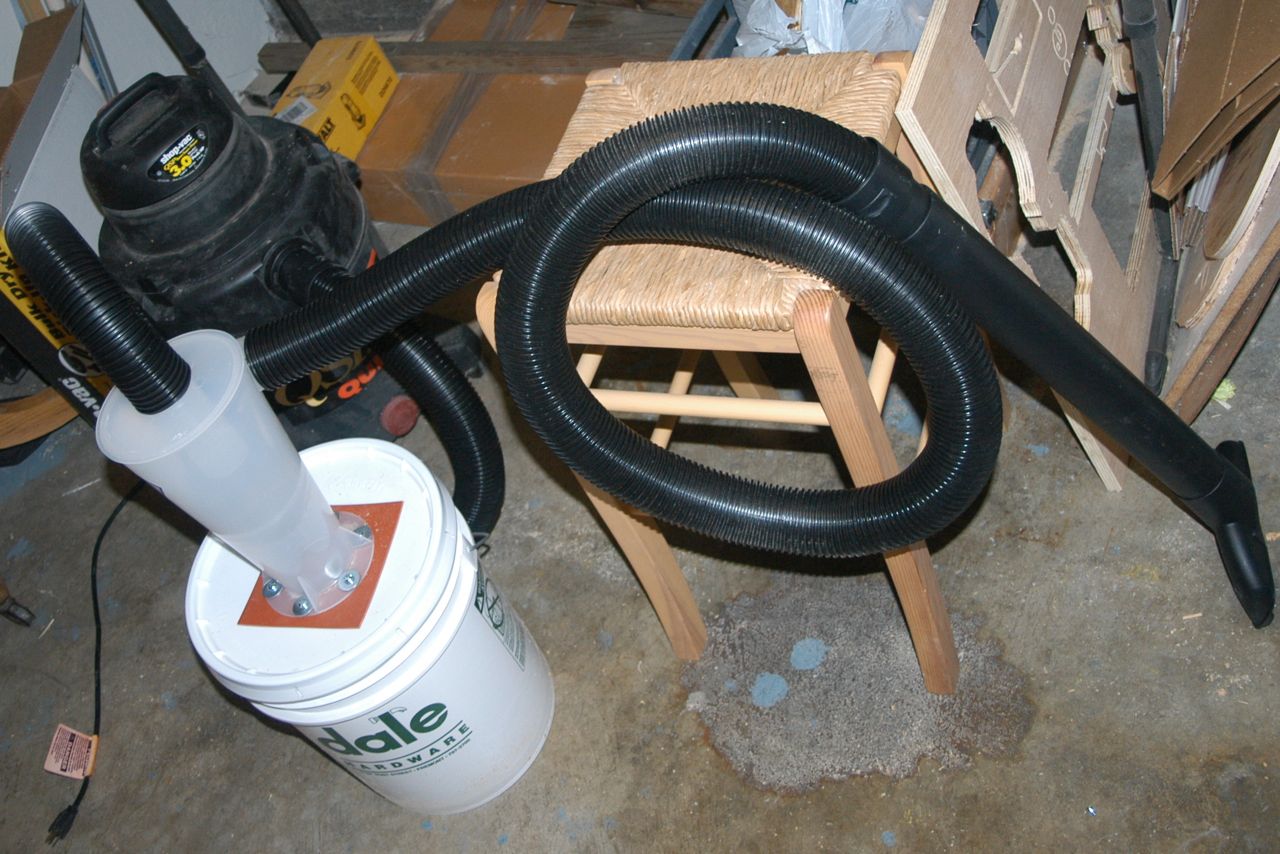
Here’s a photo of the new “system”:

So the nozzle hooks to the side of the Dust Deputy (which of course bolts to the lid of the bucket) and then the hose going out of the top of the Dust Deputy goes to the Shop Vac.
I spent a little time trying to figure out how to couple hoses to the Dust Deputy and finally decided that “au naturel” (hose directly connected to Dust Deputy) was easiest to implement. This means that the hoses attached to the Dust Deputy aren’t all that useful for being used by themselves (because any nozzles really want there to be a modular hose connector on the end of the hose). That’s fine by me. If I need to use the Shop Vac by itself, I will just go back to the 1-1/4″ gear, which already has all the modular stuff attached.

Another step towards “automatic” dust collection in the woodshop.

Posted in Making, Woodworking | Leave a comment

CNC – parts is parts

I fired up the CNC machine over the weekend.
I was trying to figure out how to cut concentric circles in a piece of plywood, and decided that it would be easiest to do it “in software”.

The hardest part of the job was getting the workpiece clamped down in exactly the right spot so that the axes lined up properly. If I’d been cutting the piece out from scratch, this would not have been a problem.

Once the part was all set up, though, creating a CAD drawing of my desired part was pretty straightforward.

The cut took about 8 minutes to complete, not too shabby. I wish the machine was a little faster, and I wish that it was a little more accurate. But having a part appear before my eyes was really nice.

Here‘s a link to the blog entry about the job.

Posted in Computers, Knowledge, Technology | Tagged | Leave a comment

CNC – 3D, baby!

… well, 2.5D anyway.

This is by far the most complicated design I’ve even attempted on the CNC machine. I learned a lot. In particular, I learned that the machine is *slow*. This carving took about 14 hours to cut out. I had to break it up over 2 days, and went “a little past quiet hour” on the second.

I could speed it up considerably next time with a few configuration tweaks.

In addition to extra speed, I really need to figure out my tool width — the tool marks on this one were really severe, and it took a lot of sanding to get things to where they are. I might try seeing if I can get it to step “offset” on each pass, to randomize where the tool goes. shrug. I’ll ask around.

I found some source art on the ‘net, but had to turn it into a heightmap myself, by hand. The concept is, you take a bitmap, then color it black anywhere you want the machine to cut all the way through, white where you want it to cut not at all, and shades of grey for all the levels in between. It takes a little mind-bending to stop trying to color it with highlights = white and shadows = black… I am really pleased with how the heightmapping (and thus the 3D nature of the backboard) turned out.

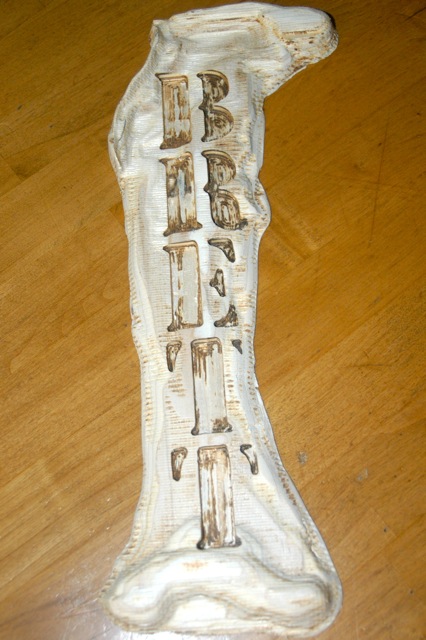
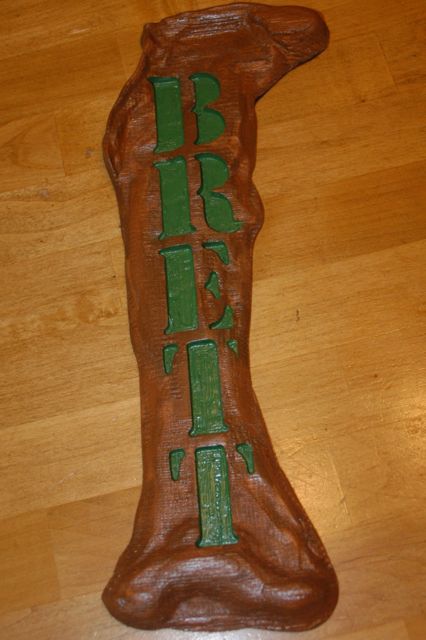
Anyway, without further ado, here it is. My first 2.5D cut on the CNC-to-be-named-later, hot off the CNC, and all ready for Christmas delivery! Kristi did a great job with paint and varnish. I really like the “fossil” effect of the brown.

2 down, 2 to go. The next two need to be designed, too. argh. Maybe I will find something cool that is simple to cut… (edit: I’ve decided to deliver 2 great ones rather than 4 mediocre ones. Watch this space for more signs in 2011)

Posted in Making, Woodworking | Tagged | 6 Comments

CNC – fully functional

I finally brought all the pieces together today and cut my first “real” project on the CNC machine.

To this point, I was hamstrung by a variety of startup costs, both financial and temporal.

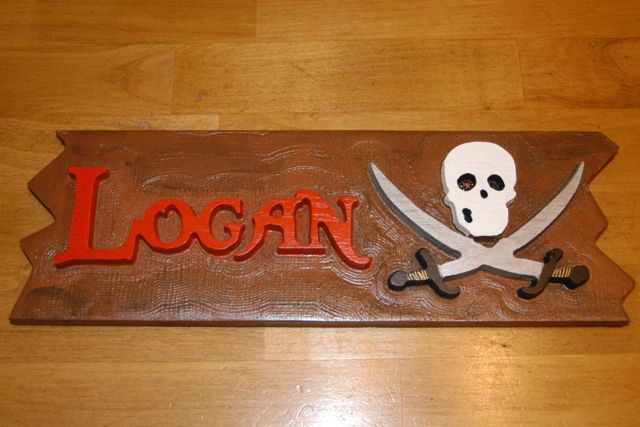
I wanted to really see how accurate the CNC machine could get, so I picked an easy-to-draw, but time-consuming-to-cut piece, with raised lettering and raised graphics.

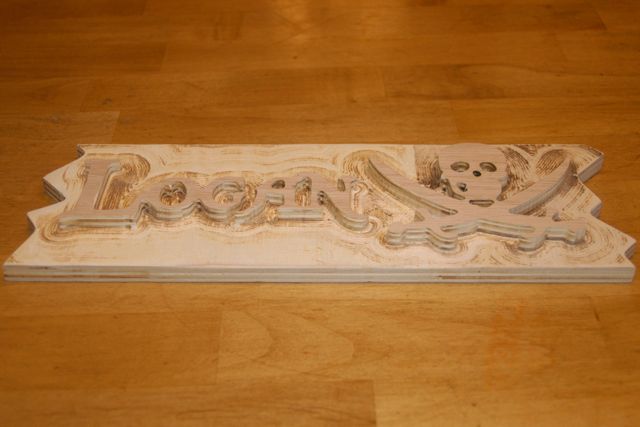
The piece is about 12″ x 4″, and came out pretty nicely, if I do say so myself:

…and here it is, ready for Christmas delivery! Kristi did the paint-and-bling job. Very cool looking. She says that the raised letters are more difficult to pull off than the recessed ones, but I think the results are nothing short of spectacular.

One down, three to go. (edit: Just 2 signs this Christmas. More on the way as time permits!)

I might re-cut this out of solid wood, too. It would work well on a two-by-four. The sanding of all those little corners is the trickiest part.
This also took almost 2.5 hours of machine time to cut. The machine is… slow. 🙂

I was cutting 1/8″ deep at a time. I could probably go 1/4″. That would speed things considerably. I could probably push the machine to 45ipm instead of 30, also.
And of course, engraving this instead of pocketing it would have meant the job would have been done in minutes instead of hours; that’s a lot of material to remove.

Very, very fun. I should have cut this thing out months ago; I procrastinated. Simple as that. I bought the software licenses in early October, and had the graphics done before that.

Welcome to the world, CNC machine. You’ve earned your first stripe.

Posted in Making, Woodworking | Tagged | 4 Comments

Real sugar

Coke and Pepsi from Mexico are made with real cane sugar, not high-fructose corn syrup.

They taste *totally* different. It’s a crisp, light, refreshing beverage that makes you realize that HFCS just tastes syrupy.

I have been having trouble finding “throwback” Pepsi in stores, but Mexican Coke is easily gotten, if a little expensive ($1.69/ea at BevMo and $1/ea at Mi Pueblo).

If you haven’t tried it, do. Yum.

Posted in Knowledge, Science | Tagged | 2 Comments

CNC Build, Day 22 – parts is parts

The X-transmission nut has really been giving me a hard time. It hangs in there for about 15 minutes, then pops loose, and I end up spending 20 minutes fixing the silly thing. This part of the design really needs to be cut accurately, and my hand drilling isn’t cutting it.

I have been having problems with my CAM program; my free trial ran out, so I am on the hunt for another one. Most CAM programs take .DXF (AutoCAD) files as input, so I decided to try out a full 3-tier Cerberus approach to building myself a new X-transmission nut.

I downloaded SolidEdge 2D, which is a professional-grade CAD program, but completely free! They are trying to upsell to their 3D package, but I think I’ll be able to live for awhile with 2D (and converting to 2.5D in the CAM program).

After some fits and starts, I got SolidEdge kind of working, and was able to lay out the part with exact dimensions and placement. Nice. Saving as .DXF was easy.

I got it onto the PC and tried out LazyCAM, which is the free CAM that comes with Mach3. The folks at ArtSoft should stick to Control software (and they have, bless their hearts), because LazyCAM is… not feature-rich.

Rather than waste a bunch of time trying to learn a third CAM package, I decided to force CamBam to do the job. Turns out that the crippled version will only do one MOP per GCode file. So, I saved the MOPs off to separate files, and merged them together in WordPad. Not a problem.

An aside: next thing I have to do is raise the router mount, because there is *very* little clearance under the bit right now. Back to the show.

I tested out the cut, and started it up. Ran into the first “bug”; I was cutting out the edges of the piece first. That would have made the drilling part difficult. So I stopped the cut and edited the G-code to put the perimeter part last.

Start up again, drill #1, OK. Drill #2, OK. Drill #3 (actually a full-depth “pocket”), OK. Hey, we’re on a rol– oops. I forgot to add a “please raise the drill bit” after the pocket and before the perimeter cut, so now I have a full-depth diagonal gouge in the part. Oops. Edited the G-code again, put in the proper command, and re-set the machine to cut in a new area of the board.

This time, everything went perfectly. The piece looks great. I did cut it a little too close to the old part, so one edge is a little rough. Other than that, I didn’t even have to sand it. Nice.

Oh, I forgot and went way too deep, right down to 0.75″ So my table is starting to gain some interesting scars. shrug.

I spent some time putting away tools and moving the drill press. The garage looks pretty clean again, except for all the sawdust. It’s still on the list of TBD.

I used the drill press to do the edge-to-edge holes through the part, and installed it. It went in really nice. No photos; the part doesn’t look so impressive unless you know what I had to do to create it.

With the part in and tested, I spent some time scratching my head, thinking about how I am going to mod the router axis to make best use of the new router mount. I did all the measurements, and ended up deciding that I am going to move the router mount up by about 2.5″. That will allow the router to touch the table if need be, but also give plenty of clearance for thick workpieces. Since the router mount actually holds the collet about 3″ below the bottom of the mount, I will just drill new holes for the router and install it in situ, rather than cutting the Router Gantry sides. Nifty.

So I have a little bit of CAD experience now, and unfortunately, I am still working on CamBam, so it’s feeling like I may end up buying it. grr. There are 2 other possible CAM programs to try, though, so we’ll see. And hey, maybe LazyCAM is secretly awesome and I just need to figure it out more. Who knows?

On the TBD:
– get a CAM program.
– drill the new router mount holes.
– get some vacuum already.

Posted in Making, Woodworking | Tagged , , | 2 Comments

CNC Build, Day 21 – on the case

OK, I knew I needed to work on getting the electronics mounted into a case. It’s a pain to have to unplug from the wall to turn things off. But last night’s catastrophe put me in a mood to get this thing fixed once and for all.

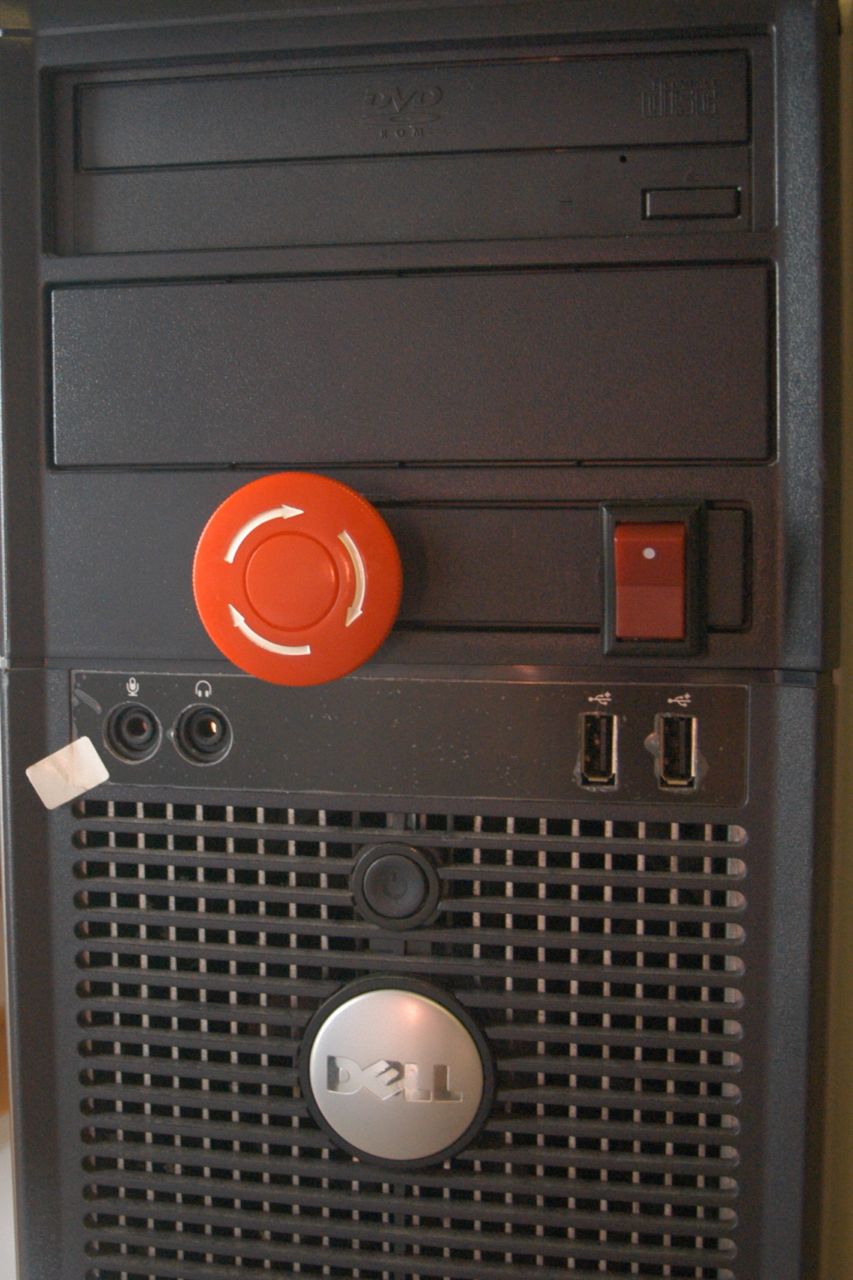
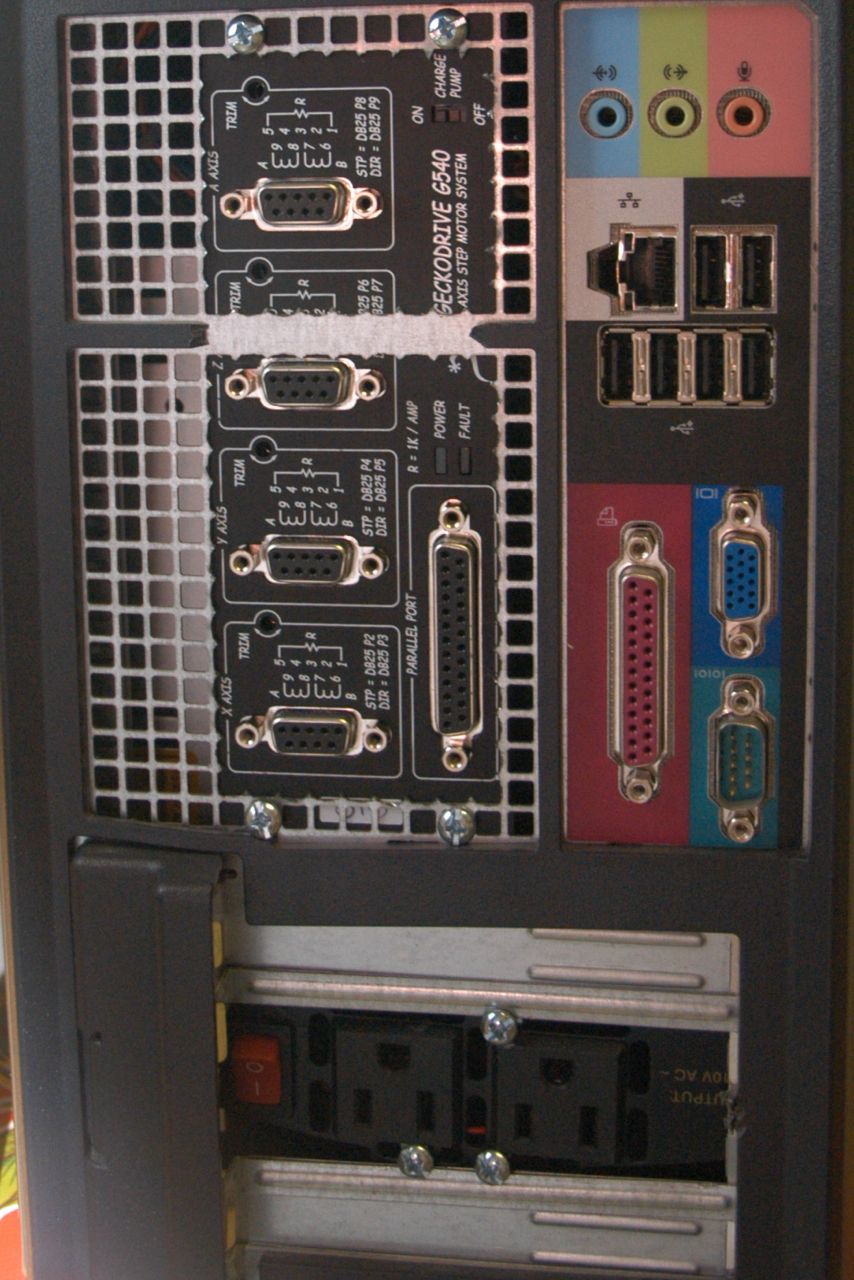
So I measured all the bits and parts, scratched my head a little, and was about to head to Fry’s to find a big enough project box, when I decided to maybe try something a little unconventional. Some test-fitting, some screws from the hardware store, and a careful application of drill and diagonal pliers, and here’s what I’ve got so far:

I put the Emergency Stop and Power switches up front…

…and the Gecko and power outputs in the back. The extra switch near the power outputs is not in the current design, but since it’s there anyway, I might use it for an “enable” for the relays (vs just shunting the AC directly to the outputs). Now that I think of it, though, that should probably be up front…

I think it looks pretty sharp already, but I still have some work to be done before I’m ready to turn the rig back on. Specifically, I need:
– a 110VAC male receptacle for the back (to plug in the CNC power supply)
– a DB9 male connector for the back (to plug in limit switches)
– Some LEDs up front (power indicator, e-stop enable indicator)
– a couple of 48v 20A relays to hook up to the DC power supply and the AC (to switch the router and vacuum from software; that’s what the 3-prong outlets on the back are for)
– 6 limit switches (one for each end of the 3 axes)
– an extra case fan or heatsink for the Gecko (it gets hot)

In order to get back up and running, I just need the 110VAC receptacle. Once I get it and wire it up, I will have the electronics I had before, plus an E-stop and a power switch.

I like the idea of having just one box to kick around.

Posted in Electronics, Making | Tagged | 1 Comment

CNC Build, Day 20 – Robot self-upgrades!

I designed a new router mount for the CNC machine today, and the CNC machine cut it out! Long build notes below, but I just can’t help a “brag photo” first:
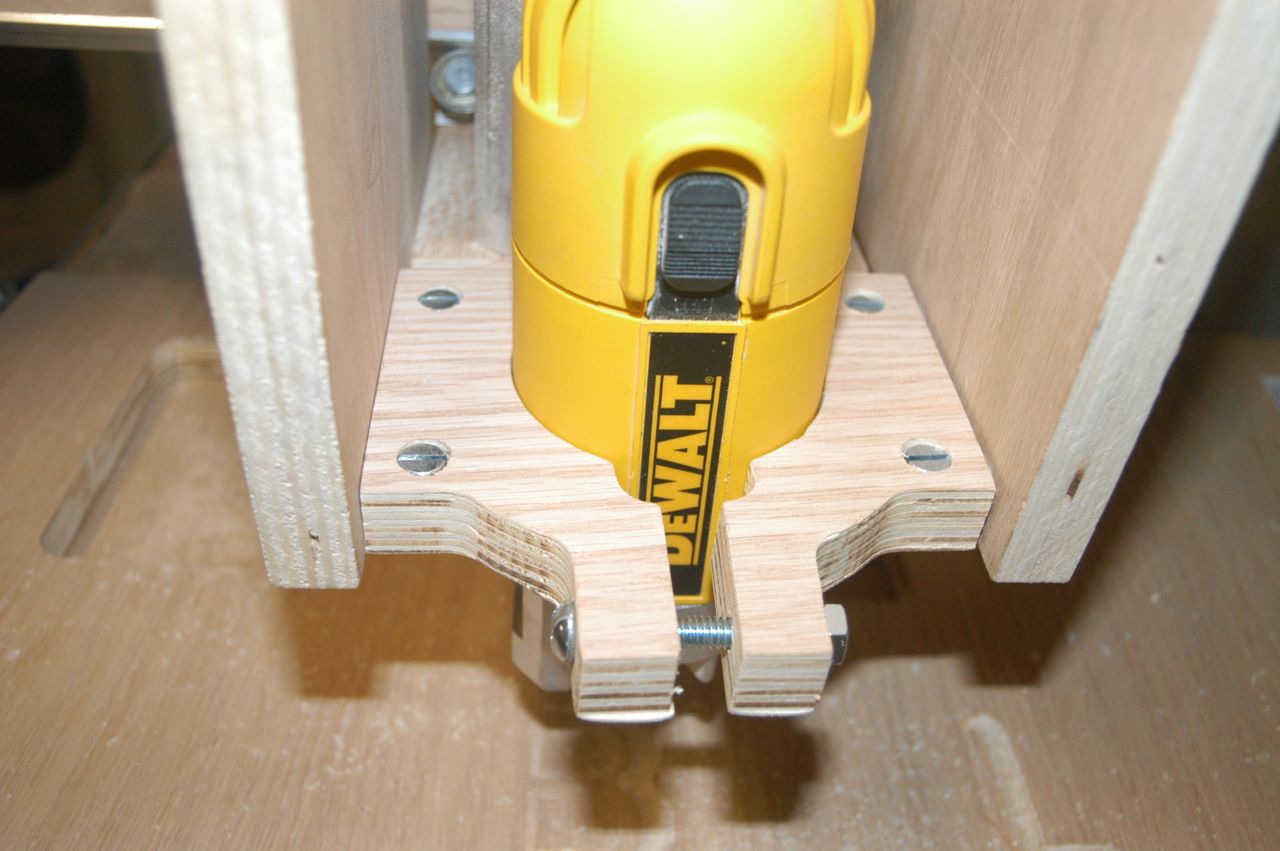
oooh, pretty!

OK, here’s how that object came to exist.

I have been unhappy with the original router mount. The way that it is set up, the router sits in its normal router base, which is bolted to a chunk of 3/4″ plywood. Since the router base is built such that the collet won’t extend beneath it, this means that changing bits is problematic, but more important, the bits all lose about 3/4″ of their cutting length. This means that a 1″ cutter which normally would have no problem eating through, say, a 3/4″ piece of ply, is now demoted to a 1/4″ cutter that can’t come close.

So it was clear that I wanted to build myself a new router mount.

What with one thing and another, there was no reason not to let the CNC machine do the cutting part, since, hey, that’s what it’s for.

It took me some time to work out all the geometry in CamBam. I even ended up cutting out a “tester” one, which ended up needing some tweaks to make it work. I may throw some photos of that “alpha” build up, just to show where my head was at.

Among things I needed:
– I wanted to make a “clamp” system
– ID needed to fit the router pretty closely, although I had some clamping action
– OD needed to be large enough not to break
– I needed a “nose” to put the clamp bolt through
– I needed a way to attach the mount to the CNC machine

All of these were on the first one I cut, but as soon as I put it up next to the CNC machine, I noted a really cool way to mount the new clamp — I could just design it to fit right where the old mount did!

There was also a problem getting the clamp over the router’s power switch, which has a little raised area.

So, back to the drawing program, and I came up with this:
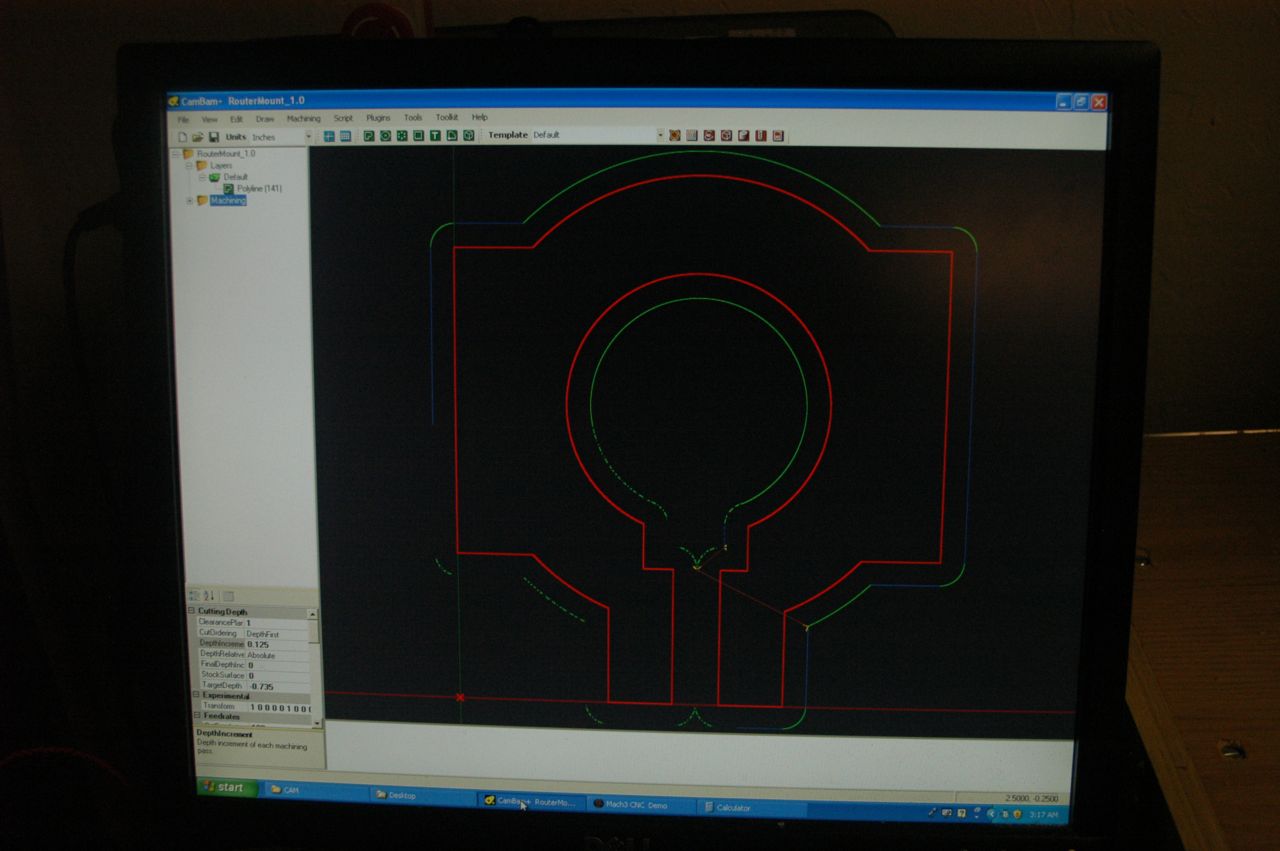
The “tabs” on the side are where the cross dowels go. I was pretty proud of myself, figuring that part out. I think the “rear” part that you can’t see because it’s close to the Z-table is my favorite part. It looks really cool. It’s real hard to do that kind of round-to-straight cut without a CNC.

You would not believe (actually, you probably would) the amount of “add a little width here, shave off a little there” that I had to do.

An aside: I’ve been playing around with the proper depth to cut. I am trying not to gouge the table but also make it all the way through the ply. At the end of the day, I don’t think both are possible at the same time, at least not with the warpy plywood I have and the probably-not-flat table. Anyway, I’m not too worried about it, but the CNC machine is definitely starting to look more like a “tool” and less like a piece of furniture as the days go by. Back to the show.

Both cuts I did tonight went really well. The router makes lots of dust, but that’s how it works, so there you go. I set one cut for 0.725″ and the other for 0.735″. Both of them ended up gouging the table and also having “tabs” to cut off (not on purpose 🙂 ). The finished product looks pretty good though.

Once the geometry was put together, loading things up in Mach3 was pretty easy. Here’s a shot of Mach3 ready to cut out the part.
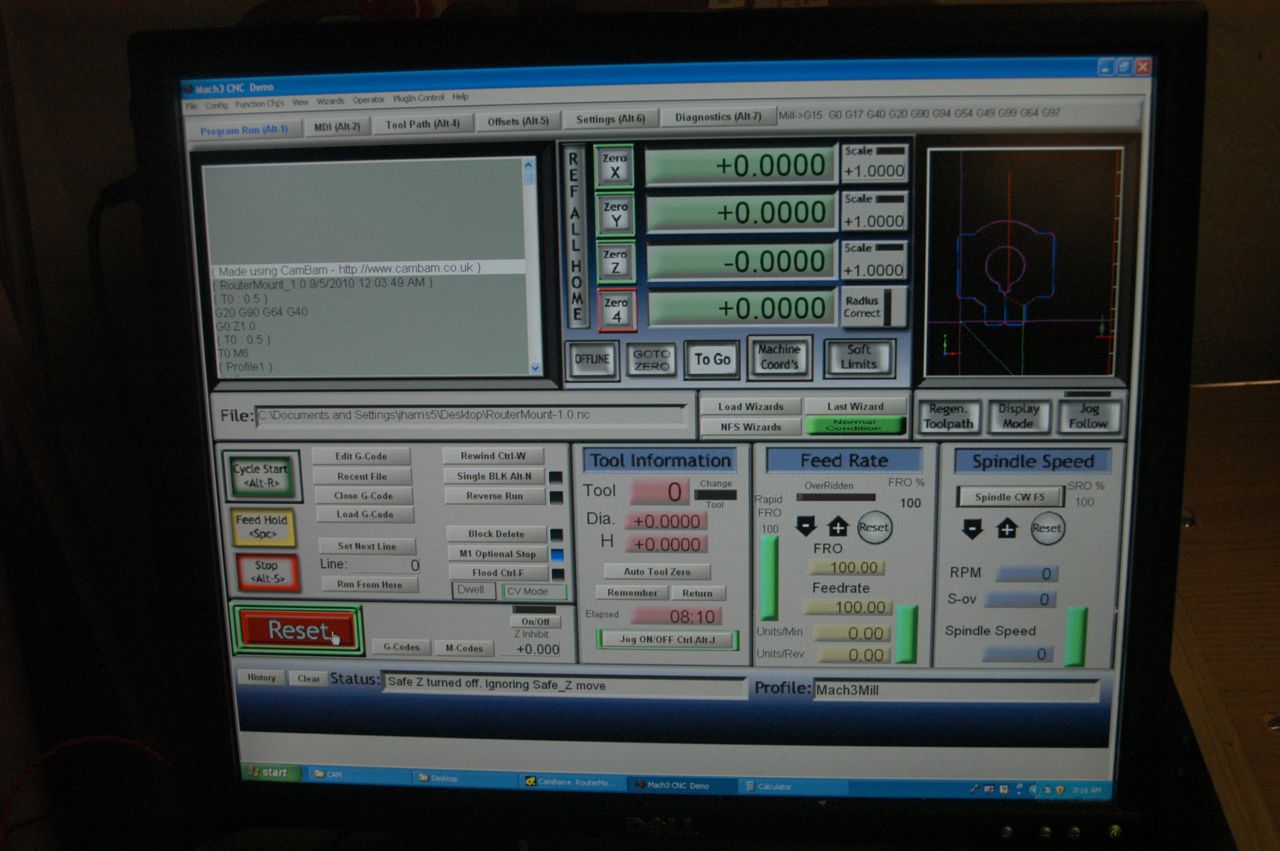
Oh, I had a scary moment. I somehow knocked the power supply off the table as I was unplugging it and it pulled the power cables out of the G540 as it fell. It made a “pop” sound as the + and – wires discharged against each other. Nothing looked too burnt and it was unplugged at the time. I went inside and spent about an hour or two testing everything carefully and building some better power cables. I really need to get a case built out for this rig. I am sick of the wires running everywhere thing. Anyway, everything was fine, just delayed me a bit.

Once the part was cut out (I do a lot of vacuuming, too. I need to work out a vacuum system, more on that later), I lined it up with the old part and transferred all the drill lines. Then I used the drill press to punch in both the “face” holes (7/16″) and the “edge” holes (1/4″)! That was pretty cool, too. I should have been doing that more in the build, but I didn’t. I had to shim between the clamp arms to get the clamp hole cut. All this went really easily; I’m getting pretty good at the drill press.

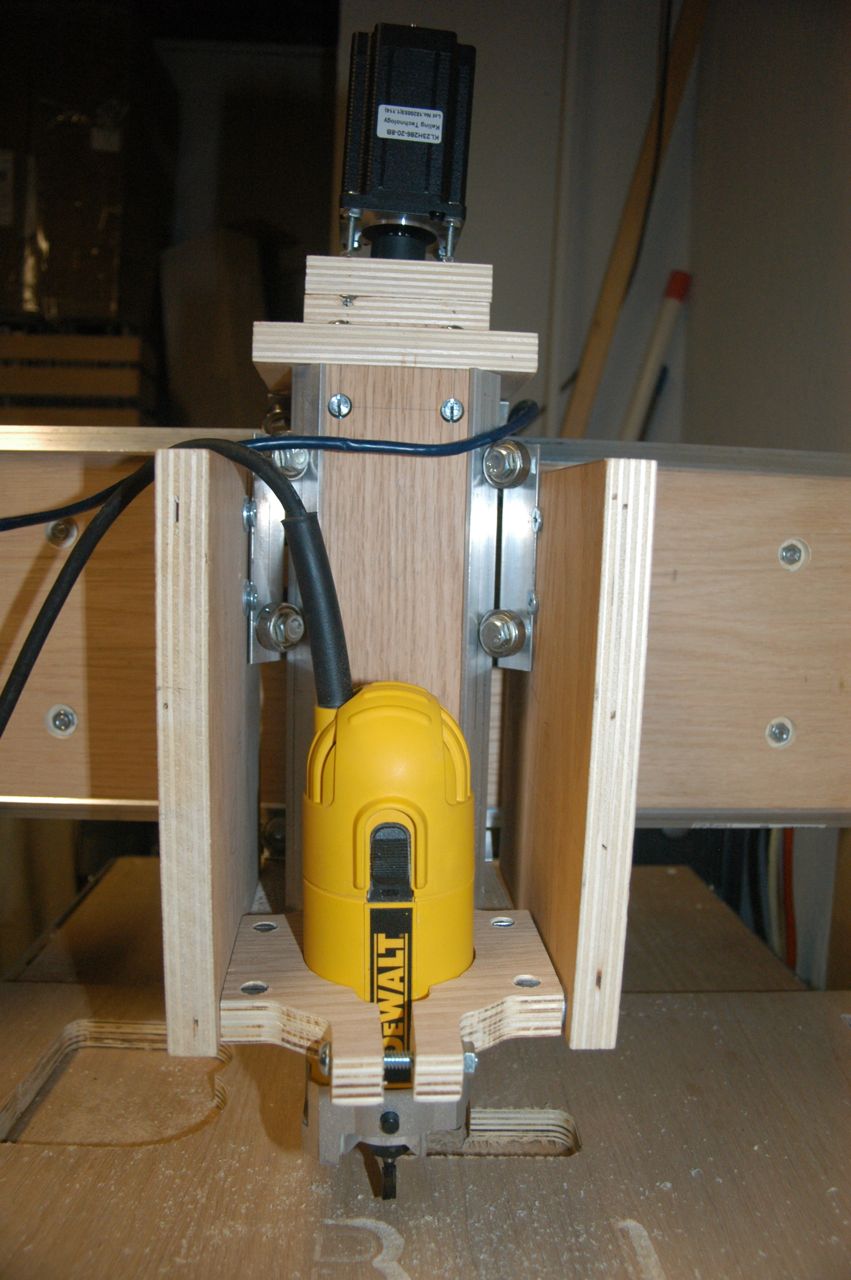
The new router mount went in without a hitch. It could have been 1/8″ wider I suppose, and there’s no way to get it on the router without either pulling out the clamp bolt all the way or pulling the power cable all the way through, but that works for me.

Among other stuff that got worked on today:
– I had to reattach the X-axis transmission nut both at the beginning and at the end of the session. I *really* need to figure out a better solution for the transmission nuts. Can you say “pocketing tutorial”?
– I went to Dale Hardware to see if I could find an end mill. I didn’t find any suitable straight mills (the Roto-Zip stuff is the closest, but it’s all for 1/8″ collet; I need to figure out how to mount a different collet on the router), but I found a nice-looking “3D Carving” mill for $18. I look forward to some signage.
– While I was at Dale, I determined that they have cross dowels. For $1.25 each (I paid about $0.25ea. online). It’s nice to know that there is somewhere in town to get them, though.
– I also picked up a kit which I hoped would get my Shop Vac really spooled up to be a shop vacuum system; my vac has 1-1/4″ hose, and both the chop saw and the Dust Deputy that I am thinking about getting use 2-1/2″. So I picked up some 2-1/2″ hose, and a 2.5″-to-1.25″ hose adapter. I tried out the parts when I got home. It’s going to take a little head-scratching to figure out how to make everything actually hook up (turns out everything is tapered, and so I need some 1.25″ untapered adapters to make it all come together). That’s for another day, but I am getting closer to not having to chase the router around with a vacuum. w00t!
– I found a CNC shop online that sells 48v 20A relays. Means I can hook straight to the G540 power supply. 2 of those will let me drive the router and the vacuum from Mach3!

Next up, case mount for the rig. I will rip apart the PC to see if there is room inside the case. Otherwise, I may scrounge another PC case. If that doesn’t work, I’ll head to Fry’s with some measurements. I need to make sure I have enough room to mount everything, plus I need a fan. This is still in the design stage, obviously.

I just can’t resist: here’s one last shot of the new (and improved!) Z axis:
Posted in Electronics, Making, Woodworking | Tagged , , | 3 Comments

CNC Build, Day 19 – Excuses to shop

I sent off the broken motor and motor controller today. It will be interesting to see how long it takes to get parts back.

I really need a new way of mounting the router, because the current method eats up a lot of usable bit. So I needed a way to cut through 3/4″ ply. I tried using a regular drill bit for the router bit. That didn’t work.

So I put on the 1/2″ router bit, which is the longest one I have, and was able to carve all the way through a piece of 3/4″ ply. The results were cool, but a little sloppy. There’s a lot of rockin’ and rollin’ happening in the axes as things move around. I think that motor balance is probably a big deal.

I need a “real” end mill. Even a 1/4″ one (which is a bit wide for my taste, but would fit the collet of the router) would work. The 1/2″ bit is a real big object.

Then I got tired and sloppy and I left the Z axis too close to its upper limit before I ran a test. Pop! The transmission nut popped loose. That’s really the weakest part of the design. It took a few tries but I think I found an alignment that will hold for some time. The Z axis is working again.

Then I tried the thing again, and nearly ground the Y axis to dust. So I moved away in Y a little, tried again, and Pop! I popped the X transmission nut. I decided that I am too tired to continue tonight, and will leave the repair for next session.

I need limit switches if I am going to be doing tests near 0,0.

I think there’s a way to tell Mach3 not to allow the machine to go negative. But I am not sure what that is.
Anyway, end mills and limit switches. Need to put in an order.

Posted in Making, Woodworking | Tagged | Leave a comment

CNC Build, Day 18 – First Sawdust!

Mellow greetings from my new robot friend.

The “spare” Z axis motor arrived today. A bit of solder and I was ready to test it out.

It took a little bit of time to get the hang of the basis vectors for the machine (where is (0,0,0), and which directions are up, forward, and away?). Once I got that nailed, though, my first test cut, a square, came off without a hitch.

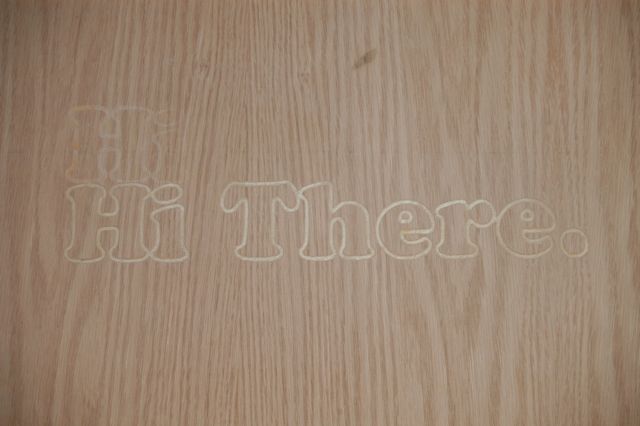
Buoyed by this success, I spent the next couple of hours learning how to cut text. Turns out it’s pretty simple. All the fonts are available, and the toughest part is figuring out the “machining” part of the equation; my first cut was in millimeters, I decided that I wanted to cut with the text rotated 90deg to make best use of my workpiece space, etc.

I also learned that working with really tiny pieces of wood is not as easy as you would think. Clamping in particular is a bit tough. So my first “real” cuts were done in large pieces that I could clamp from the edges of the table, making it important for me to know exactly how much room the Y-gantry had to move around in (or else I’d hit a clamp…).

I settled on 2″ high letters, and the text ended up being about 12″ long. The reason that it’s a shorter version of the classic “Hello, World.” is because all that extra text would have meant more tweaking of the font size to get it to fit on the cuttable area, and it was getting late. So there you go.

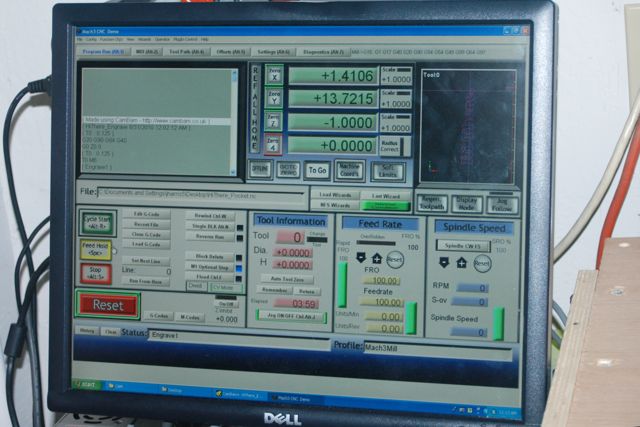
Here’s a photo of Mach3, the “control” software, running the G-code for the text.

The G-code was created by the “CAM” software. Normally, I would have had to use all 3 pieces of the software toolchain to get a cut sent to the machine, but Text is such a basic function that in fact, Mach3 itself has a plugin for it, but I couldn’t get it working, so I decided to check whether the CAM software could do it, and it could, so I did it that way.

CamBam is decently powerful. I had to figure out a few pieces of jargon in order to get it to work. I quickly figured out that trying to “trick” it (by putting in a workpiece thickness of 0, for instance) was just making life tougher. So I put in the actual tool width, work thickness, and desired depth, and things went more smoothly from there.

To test out the cuts, I set the “Z zero” point in Mach3 to about 2″ above the table, then ran the G-code. I made sure that it looked like things were moving in the right direction, and tweaked the CamBam settings as appropriate to make things look right before actually cutting the piece.

A side note: when “engraving”, CamBam added an extra G0 Z1.0, which sent the router 1″ *into* the piece, right before doing the rest of the cuts. I assume that was supposed to be a G0 Z0 to “home” the Z axis, but I couldn’t figure out how to make the CAM software do that properly, so I ended up editing the G-code myself. No biggie.

It took about 5 minutes or so to cut the letters out. I am limited to about 1/8″ depth of cut right now because of the router bit that I am using. When I switch to a longer bit, I will be able to cut out pieces, rather than just engrave in the surface.

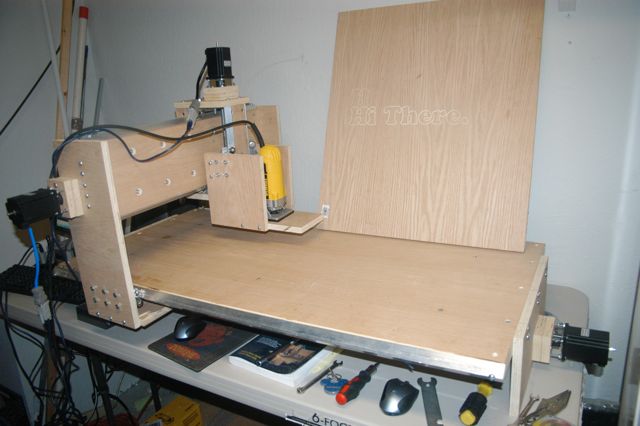
For everyone who has been following along (and for the people who find this blog later and wonder where the “build” photos are), here, at long last, is a photo of the yet-to-be-named CNC machine:

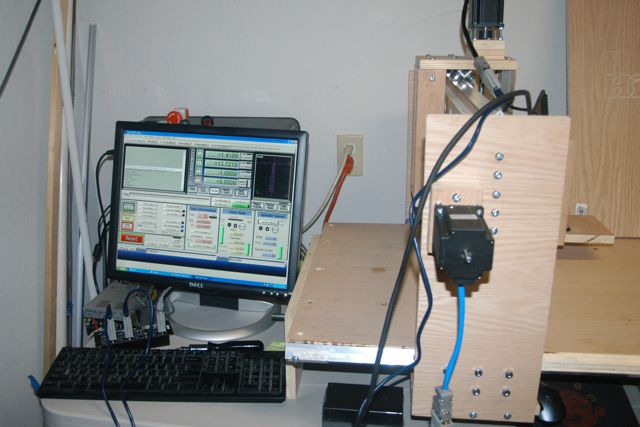
…and just in case you are into the electronics parts too, here’s a shot of the computer and motor driving gear:

The computer is an old desktop I had lying around (doesn’t take much to run Mach3), you can see the mouse and mousepad under the machine.
The silver box is the 48vDC/7.3A power supply. I have not yet hooked up the E-stop or power switches (you can see them sitting on top of the PC).
The black box with the DB9 connectors is the Gecko G540. It serves as the translator between the step/direction commands from the PC (via the parallel port) and the coil energization sequence of the motors. You can see that there is nothing hooked up to the “Y” controller, and that the Y axis is hooked up to the “A” controller, if you look closely.

I need to build a case for the electronics. In particular, I would like there to be a power switch for the DC power supply. I have been thinking that it would be cool to put the stuff inside the PC case if I can; it has a built-in fan, and seems like there should be enough room. I’ll look into it.

All in all, I’m pretty satisfied with how well things have gone so far. I’m making sawdust!

Seems like I shouldn’t call these posts “CNC ‘Build'” anymore…

Posted in Making, Woodworking | Tagged | 7 Comments